Automation
Set up and manage your automation.
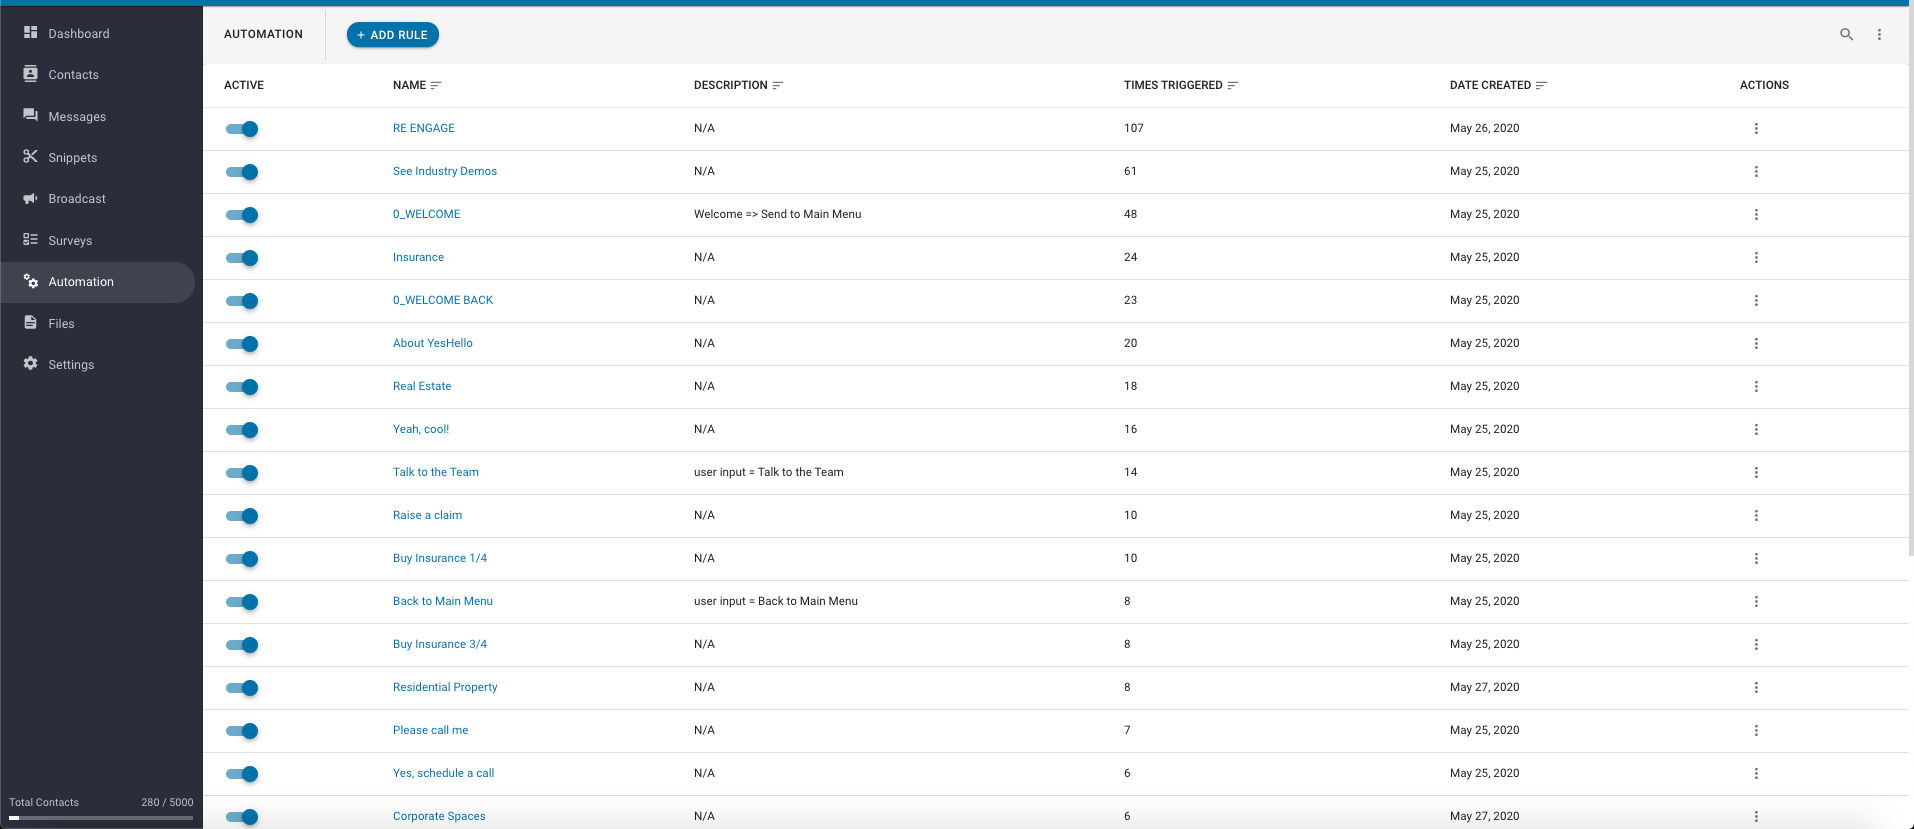
The Automation Module allows you to browse through your automations. From here, you can also create new triggers and actions to automate your Space. You can navigate to the Automation Module using the navigation menu on the left of the platform. Look for the icon that resembles a rotating gear.
Automation rules consists of two parts: a Trigger event and one or more Actions. Whenever the specified Trigger event occurs, the Platform automatically performs the listed Actions sequentially on the triggering contact.
This system of Triggers and Actions allows you to automate your workflow. You can do a wide variety of things with automations, including sending surveys and assigning contacts to the people who can best help them.
Easily deactivate automation rules on the Platform by switching the toggle off in the Active column.
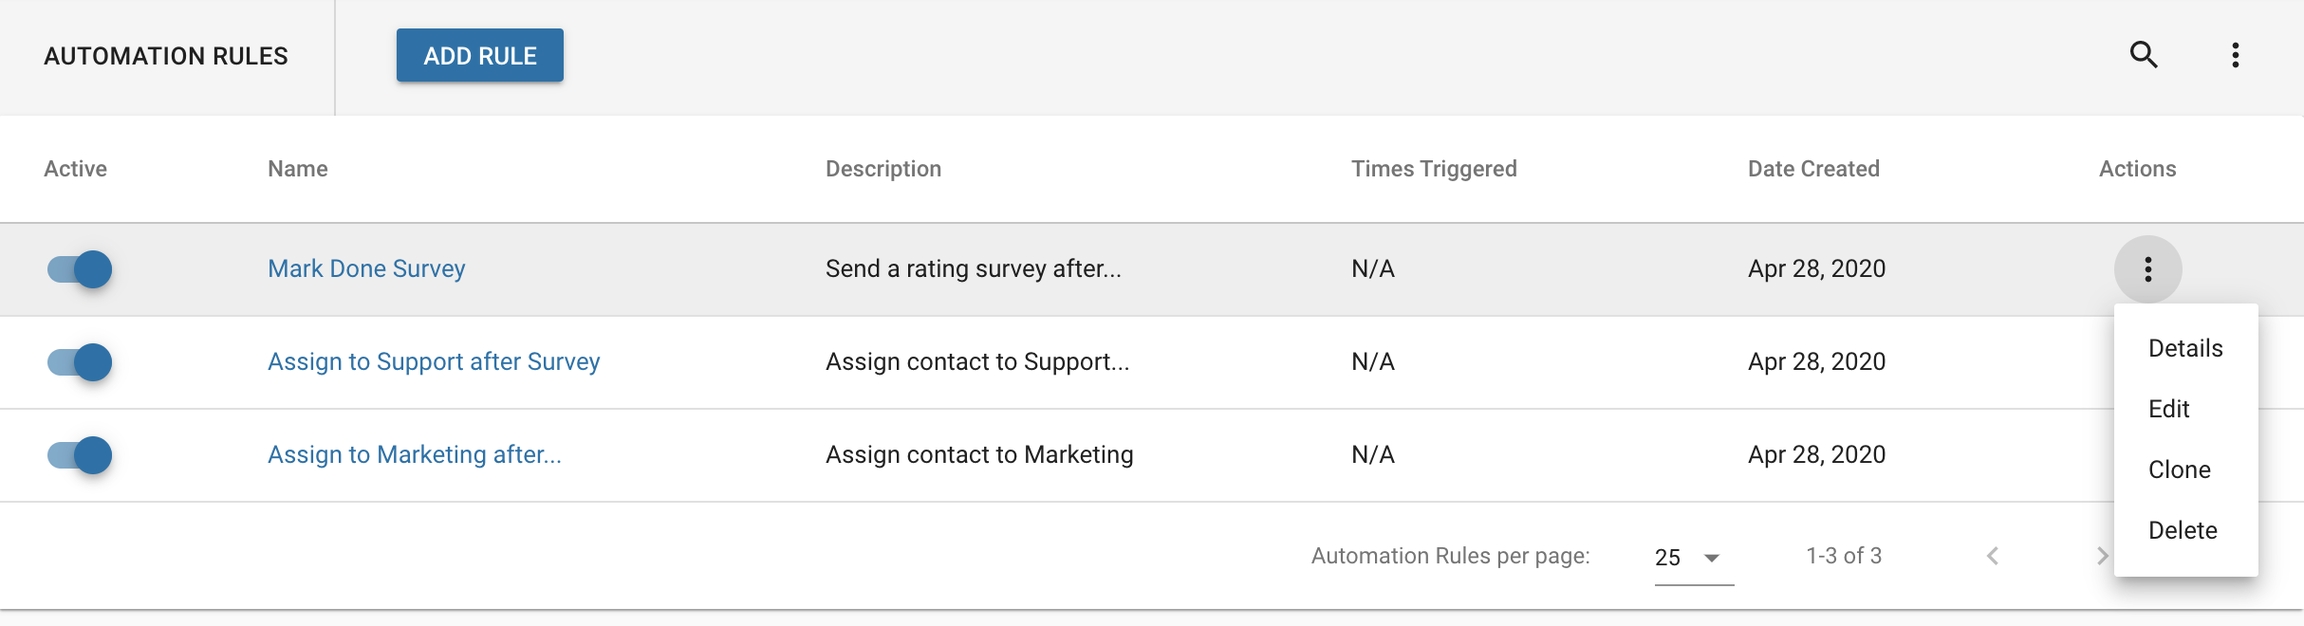
Automation Rules
From the automations table, you can see all of the automation rules you have in place. On the left, there are toggles that allow you to disable and enable each automation rule individually.
Use the search icon at the top of the Automations Module to quickly find the automation rule that you are looking for.
More Actions
The more actions button allows you to access a dropdown menu of additional things you can do with each of the automation rules. The More Actions button is on the far right. Look for three vertical dots.
From this dropdown menu you will be presented with several options:
Details: Opens up the automation rule's detailed information.
Edit: Opens up the automation's triggers and actions for you to change.
Clone: Allows you to create a new automation rule from the existing one.
Delete: This option permanently deletes the automation rule.
Be careful, deleting an automation is irreversible. We cannot help you retrieve any automation rules that has been deleted accidentally.
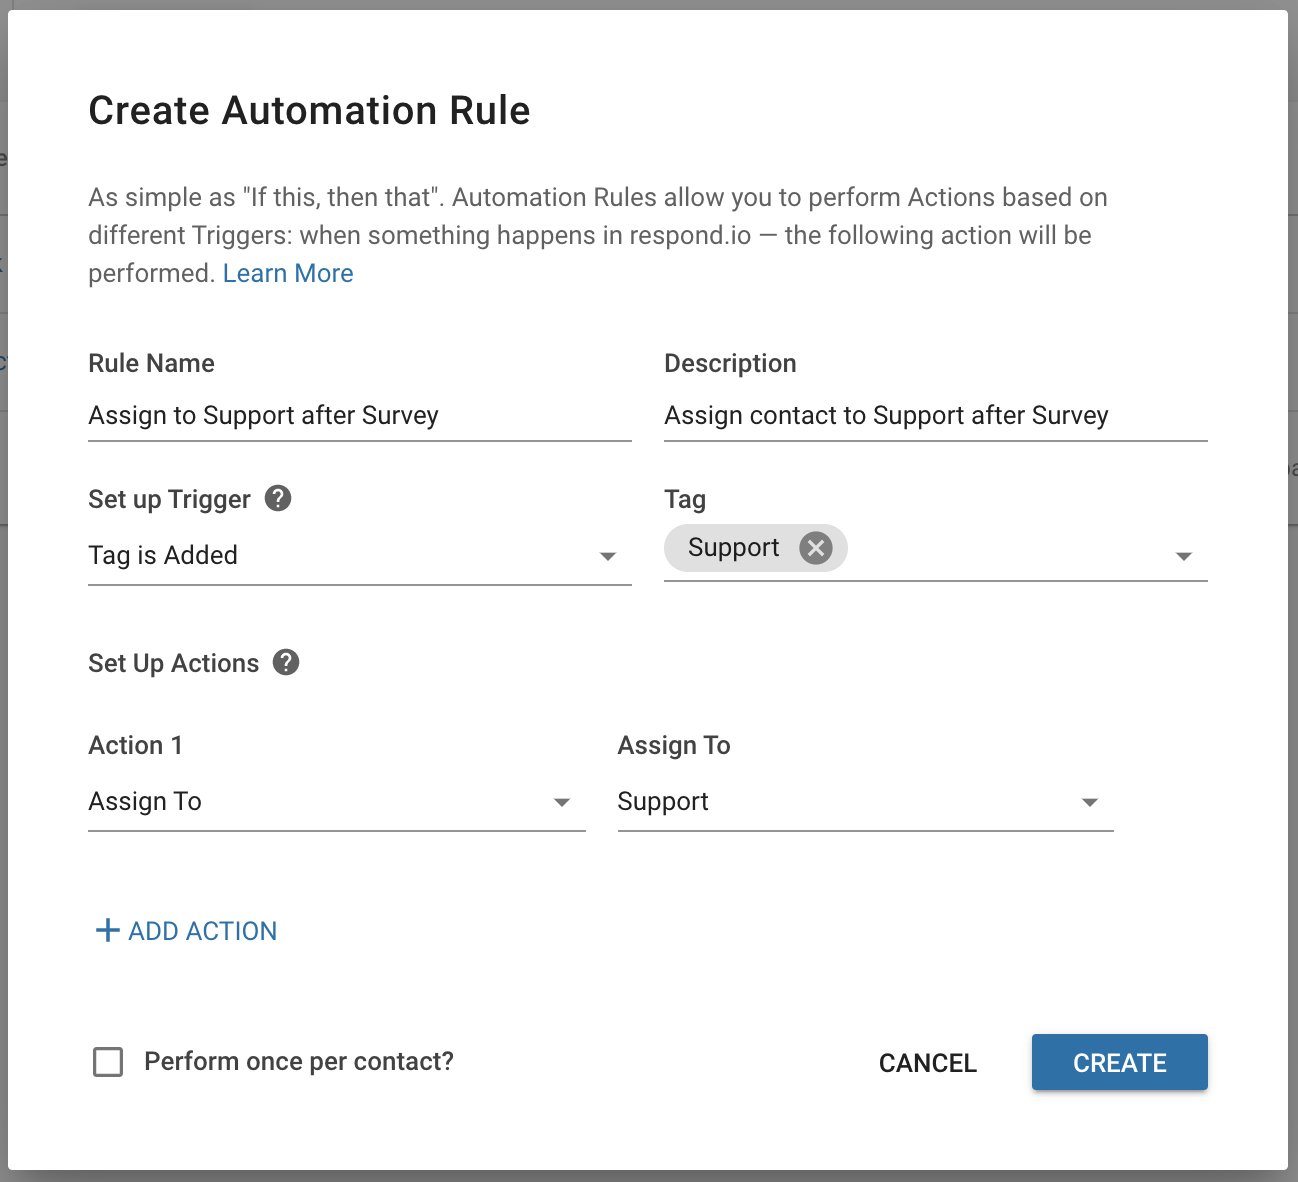
Creating a New Automation Rule
To create a new automation rule, press the blue "ADD RULE" button at the top left of the page. This will open up the Create Automation Rule menu.
Name and Description
You will have to enter a name for your new automation rule along with a short description in the first two fields, respectively. These fields do not have any impact on the logic of the automation rules, but is crucial in keeping your automation rules organized.
Setting the Trigger
The Trigger is the event that will cause your automation to run for the given contact.
Here is comprehensive list of available Triggers:
Automation Rules cannot be triggered by actions done through automations. This prevents unwanted loops from occurring.
Setting the Action(s)
Once the automation rule has been triggered, the Action(s) will be carried out sequentially on the triggering contact.
Here is comprehensive list of available Actions:
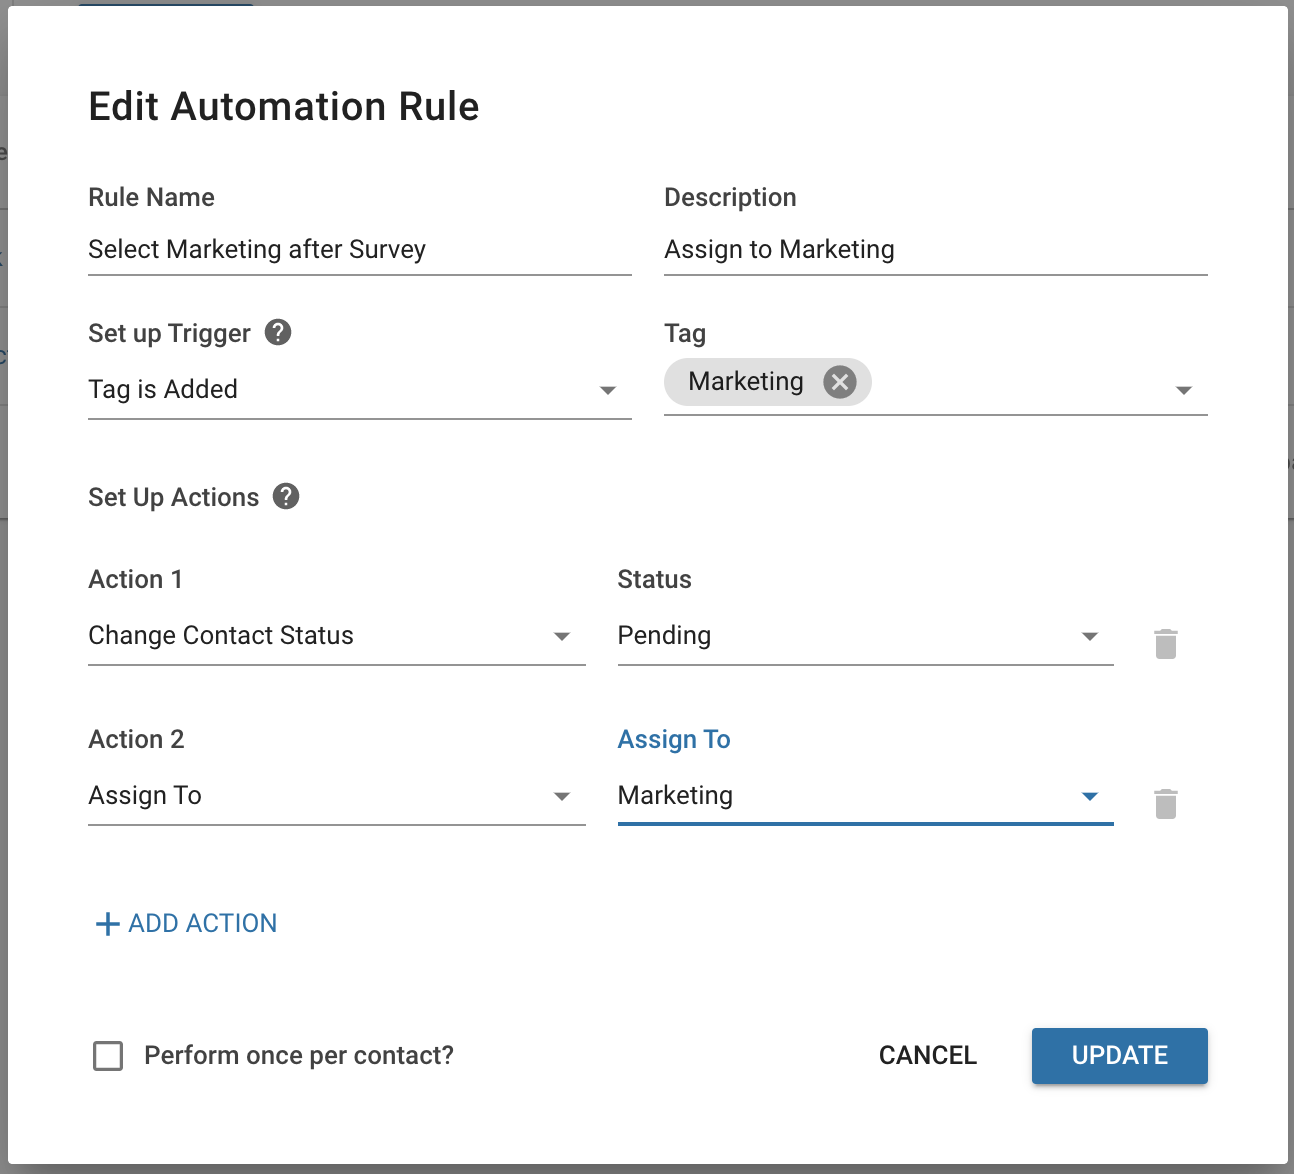
Adding Multiple Actions
The platform will perform all of the Actions in an automation rule sequentially. To add more Actions to your Automation, press the blue "+ ADD ACTION".
You can have a maximum of 5 Actions for each automation rule.
Performing Once per Contact
In some cases, you do not want the same automation to be triggered more than once for a contact. You can enable the "Perform once per contact?" checkbox to prevent this from happening.
Editing an Existing Automation Rule
You can update any existing automation rule by pressing the "Edit" button under the More Actions dropdown menu.
From here, you can change and alter the details of the selected automation rules.
Remember to press the blue "UPDATE" button to save your changes.
Cloning an Automation Rule
If you need to create another automation rule with similar processing logic, you can clone the existing rule and make changes to it.
By default, the rule will be inactive to avoid duplication of the outcome.
Deleting an Automation Rule
If an automation rule is no longer relevant or a duplicate of another, it can be deleted from the space by choosing Delete from the actions menu.
Be careful when you delete an automation rule as it may be used by other users in the space. Bear in mind that the deletion cannot be undone.
Last updated