Contacts
Look through your contacts list.
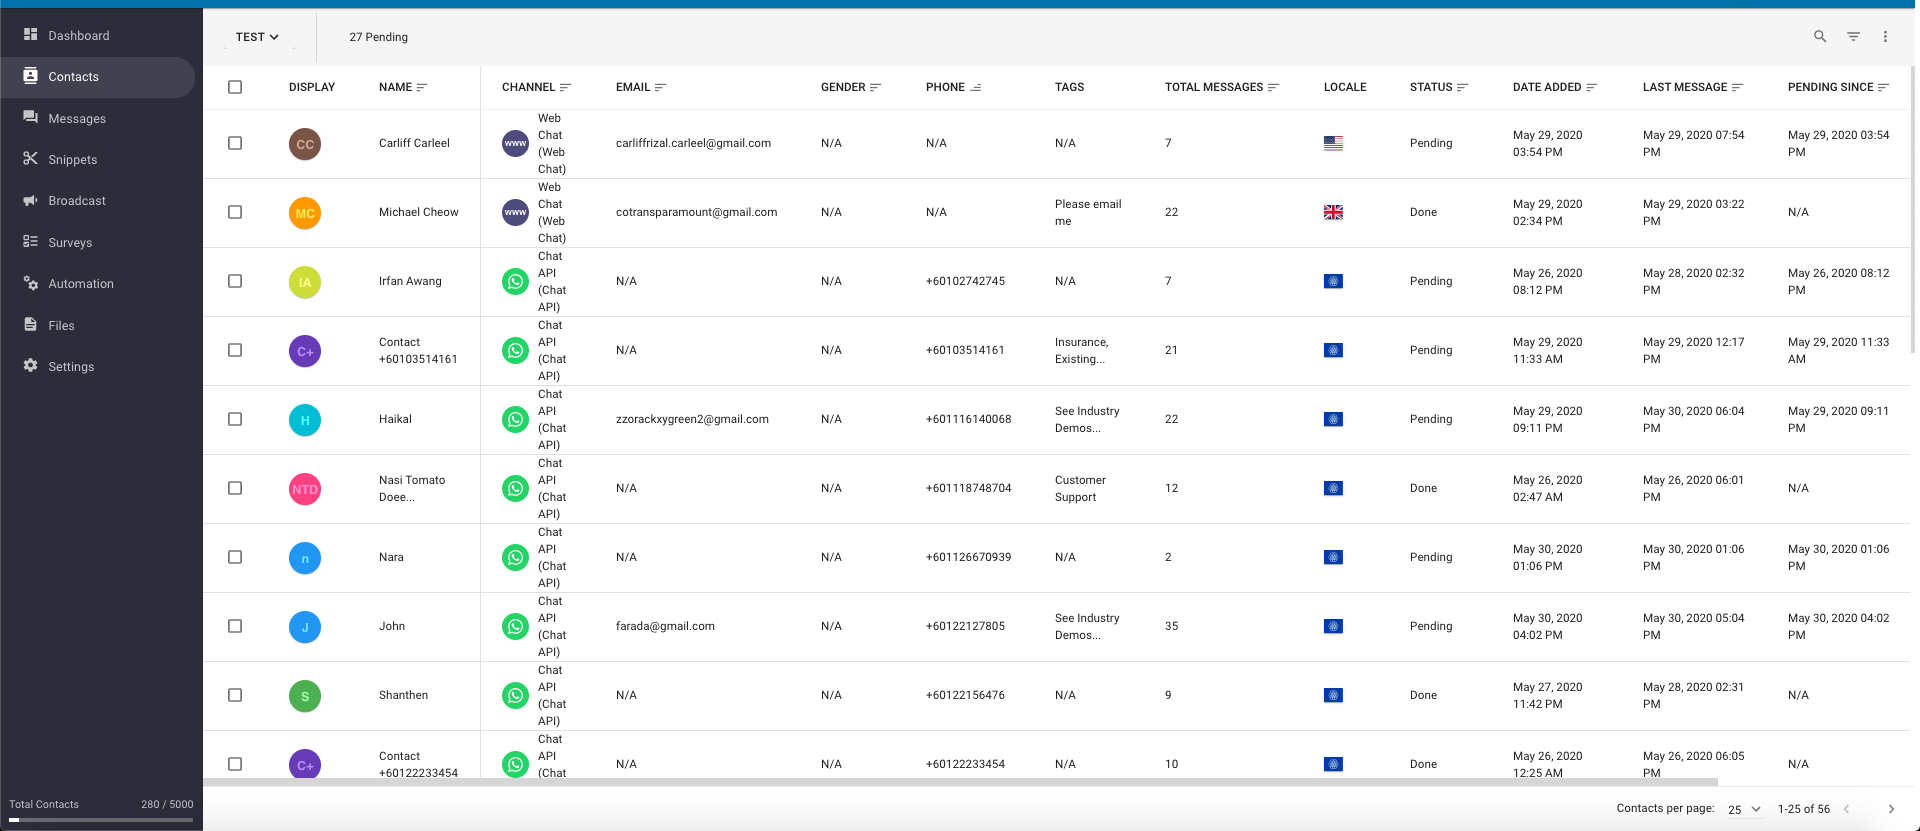
From the Contacts Module, you can take a look at everyone who has spoken to you. You can navigate to the Contacts Module by using the navigation menu. Look for the button that resembles a contact book with a person in front.
Contacts Overview
From the contacts table, you can see the overview of each of your contacts.
You can use press on the any of the headings on the table to change the sort order of your contacts table.
Note that the information displayed on your Contact table may differ depending on the columns you have selected.
Contact Profile
You can see each contact's profile image on the far left. The profile pictures are supplied by the channels that the contacts used.
For contacts from channels without profile pictures, such as SMS, a replacement avatar will be used.
Next to their profile picture, the contact's name will be displayed. The name is supplied by the channel and cannot be edited. Some channels, such as WhatsApp, do not provide names for contacts.
Locale
The locale is the language and region of the contact. This is chosen by the user when creating their account on their respective channels.
It is important to note that a contact's locale may not necessarily represent their citizenship or current geographic location.
More Actions
At the very right of each contact field, you can find the drop down menu (look for the three vertical dots).
From this dropdown menu you will be presented with several options:
View Details: Open up the contact's detailed information.
View Messages: Opens the contact's message history on the Messaging Module.
Delete: This permanently deletes the contact from your contact list.
Contact Details
You can bring up each contact's detailed information by clicking on their Name or Profile Picture. You can also bring up the contact card by pressing "View Details" on the dropdown menu at the far right of each contact field (three vertical dots).
From the detailed contact card, you can access other useful information specific to the contact, such as Phone Number and Email Address.
You can quickly navigate to a specific contact using the Search function. You can also use the Filtering options to narrow down your contacts.
Assignee and Done Status
This shows whether or not the specific contact has been marked as done.
You can mark a contact as done or undo this action by directly pressing the toggle button.
Mark contacts as not done to signify that they require further human attention.
Custom Fields
In this section, you can see all the custom field information for the contact.
Custom fields are specific fields that apply to all users other than the generic ones like name, gender, locale, etc. For example, an HR bot that manages both employees in retail and office employees would want to separate them. We can accomplish this with custom fields.
Tags
At the bottom, you can view the tags assigned to the contact.
You can add new tags or remove tags existing tags directly from the contact card. Type into the field to create a new tag or select an existing tag to add. To remove tags from the contact, press the small "x" on the existing tags you wish to remove. Alternatively, you can also press the large "X" on the left of the field to clear a contact of all their tags.
Primary usage of tags is to organize users. For example, the you can broadcast party details specifically to contacts with a “Registered” tag. This way only the relevant people who have already signed up will receive it.
Try to stay organized and keep the number of tags on each user to a minimum. Tag pollution is bad!
Filtering Contacts
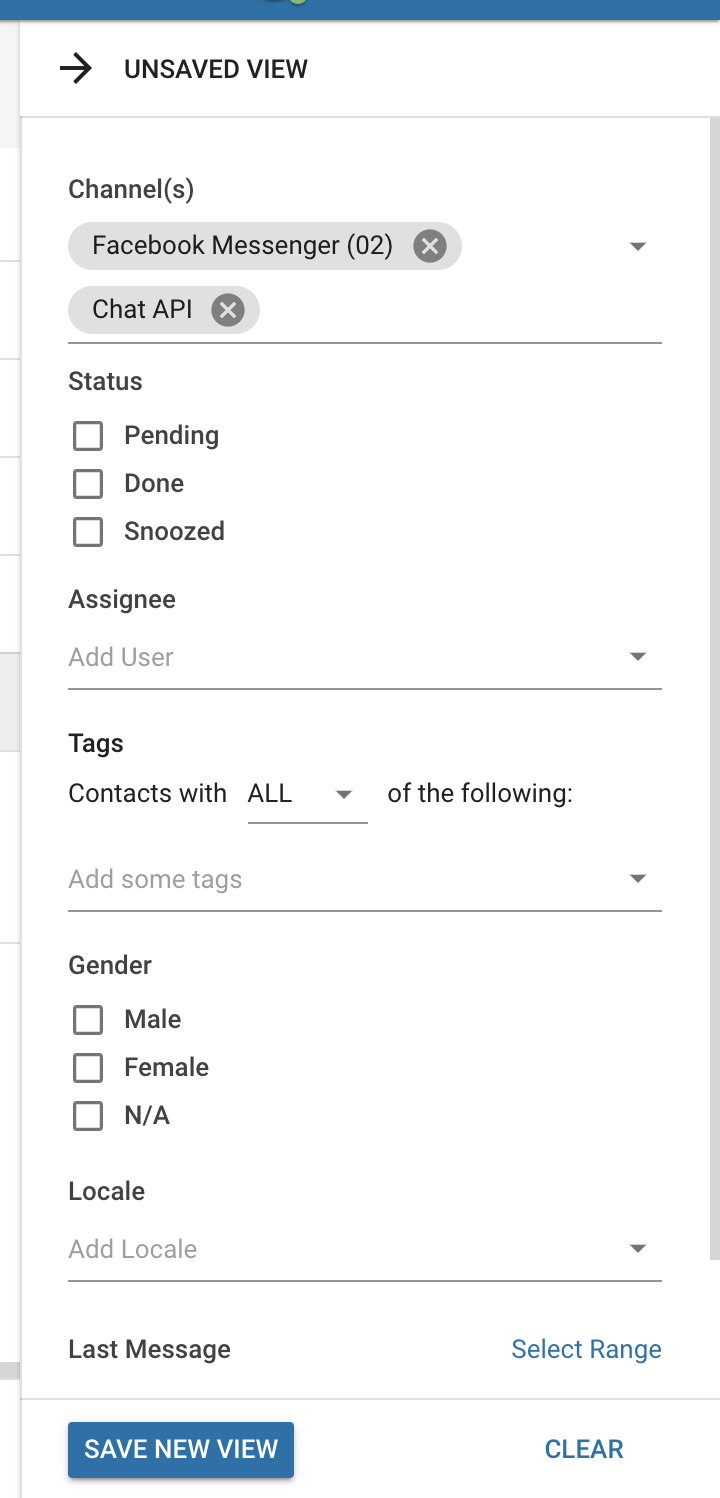
You can use the Filter options if you wish to look at a specific group of contacts. Press the Filter button to bring up the Filter options.
Once you are done, remember to press the "CLEAR" button at the bottom of the Filter options to clear your filters and return access to all of your contacts.
Save New View
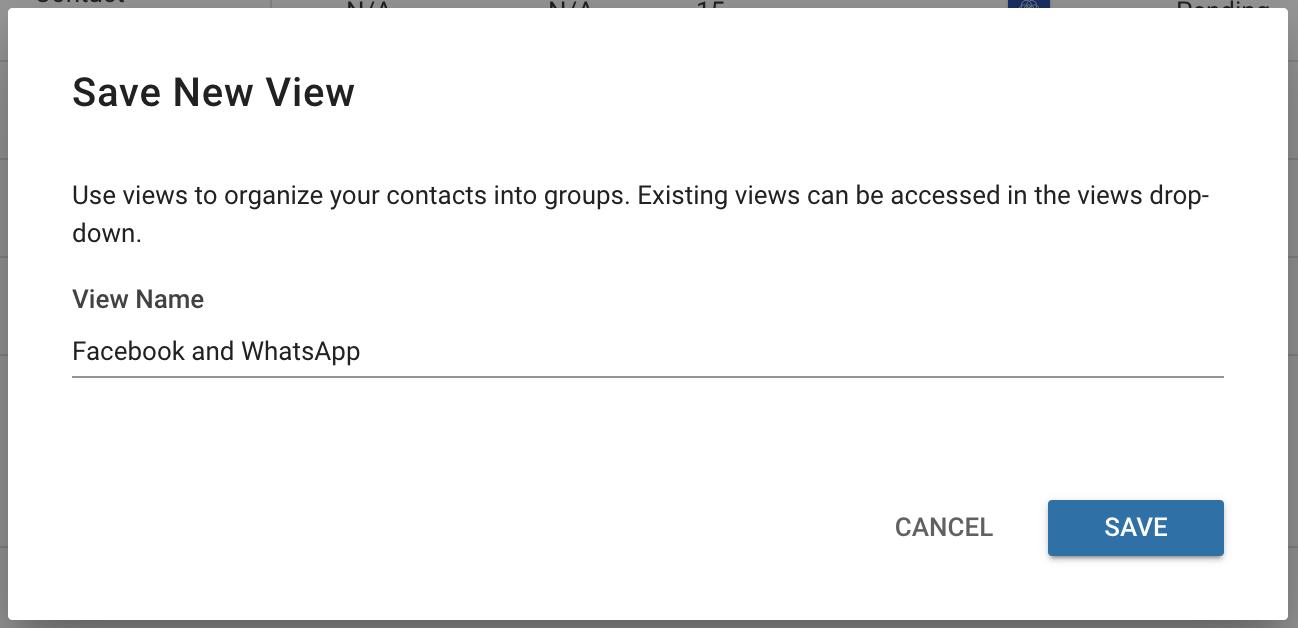
Alternatively, you can save these Filter options for future use as a View by pressing the blue "SAVE NEW VIEW" button at the bottom of the Filter options.
Give a name to your new view and press the "SAVE" button.
Learn more on how to manage Views.
Customizing Columns
You can change what columns you want to display to customize what information is shown in your contact table.
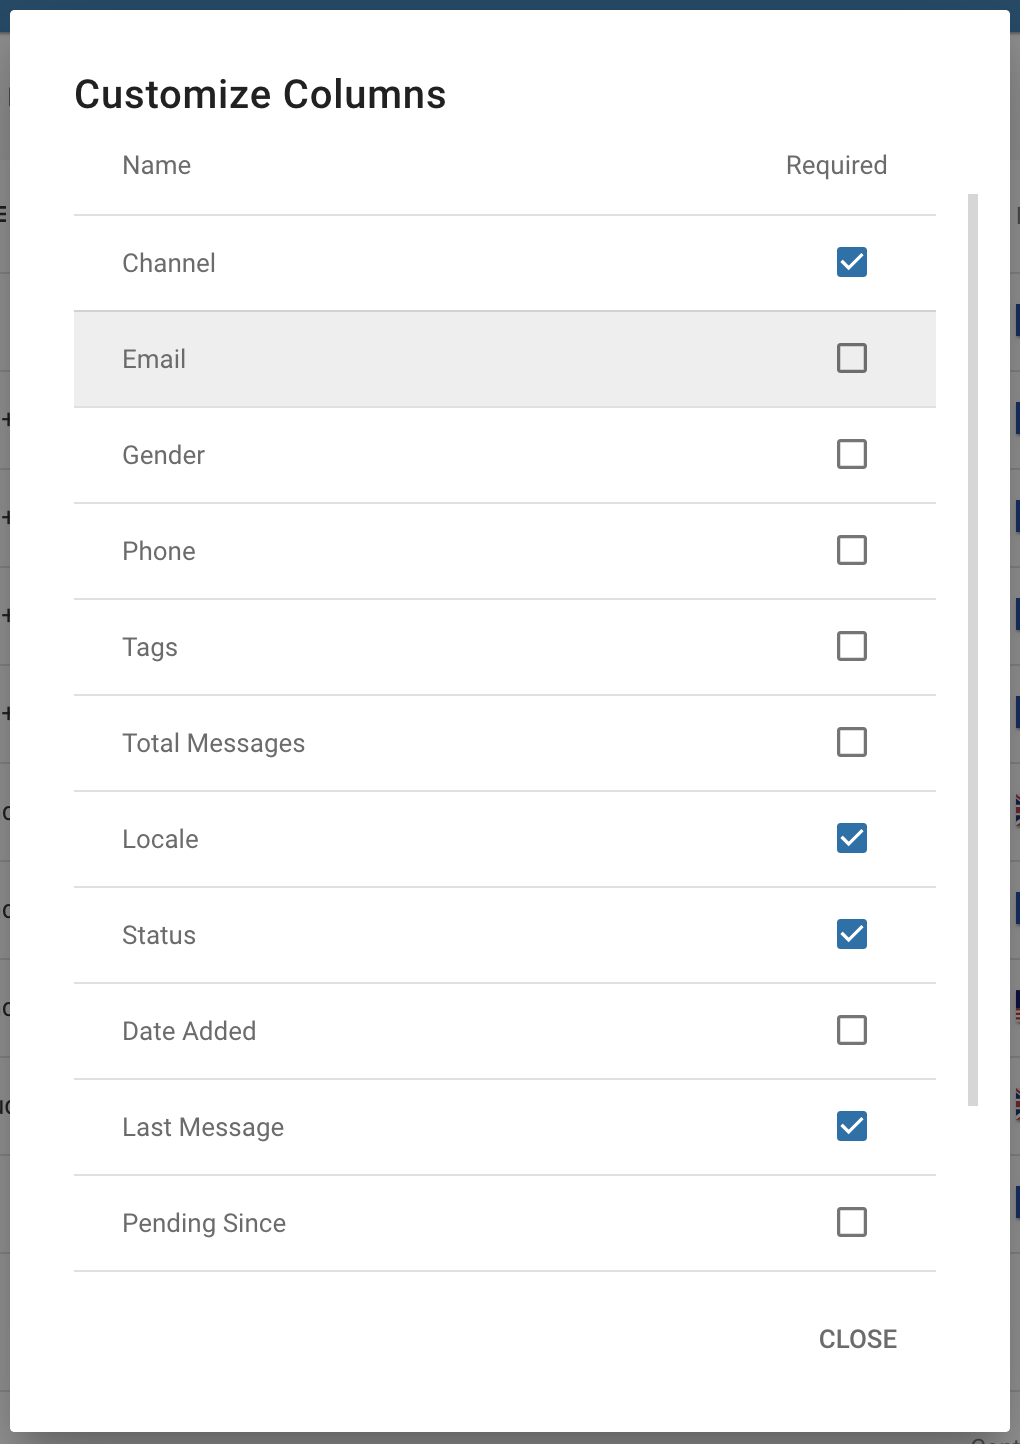
Open the contact table dropdown menu and select the "Customize Columns" option. Look for the three vertical dots on the top right of the Contacts table. This should open the Customize Columns menu.
On the Customize Columns menu, select the checkboxes of the columns you wish to display on your Contacts table.
The changes are applied automatically once you have selected your desired columns. Press the "CLOSE" button once you are done.
Column Name is required and cannot be deselected.
Exporting Contacts
You can export your contacts in a table. For example, you might want to share the list of contacts with a colleague or use this list to create a new set of records. You can choose between exporting your contacts in a PDF or a CSV file depending on your needs.
Press on the respective option under the dropdown menu on the top right of the Contacts page to begin downloading the table of contacts in your desired file type. Look for the three vertical dots on the top right for said dropdown menu.
Exporting your broadcasts in PDF is better suited for viewing and sharing. Export them as a CSV file to be more easily edited.
Deleting Contacts
Last updated