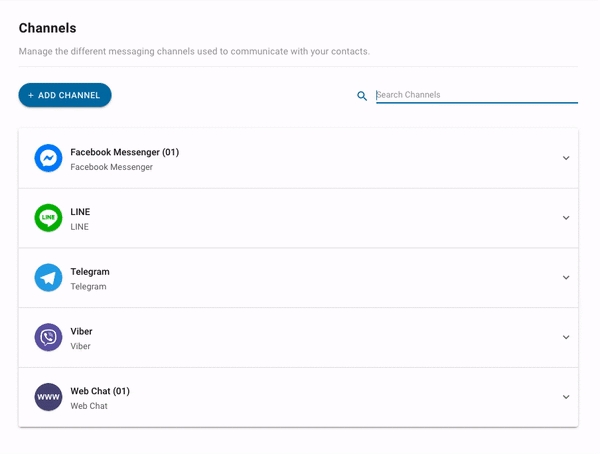
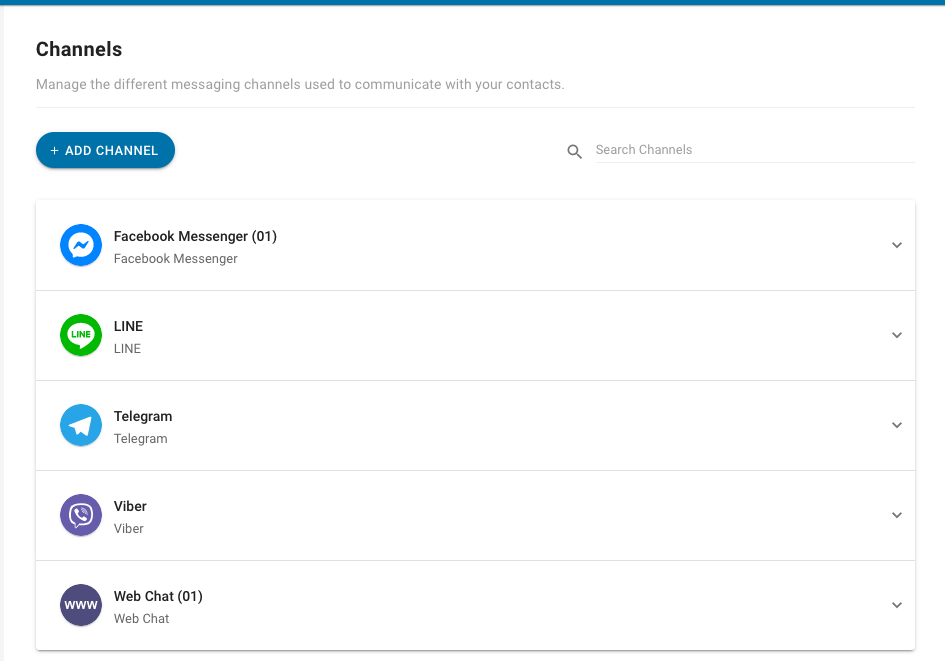
Channels
Under the Channel Settings section, you can see a list of existing channels that you have connected to your Space. From here, you can edit and manage these channels or add new ones.
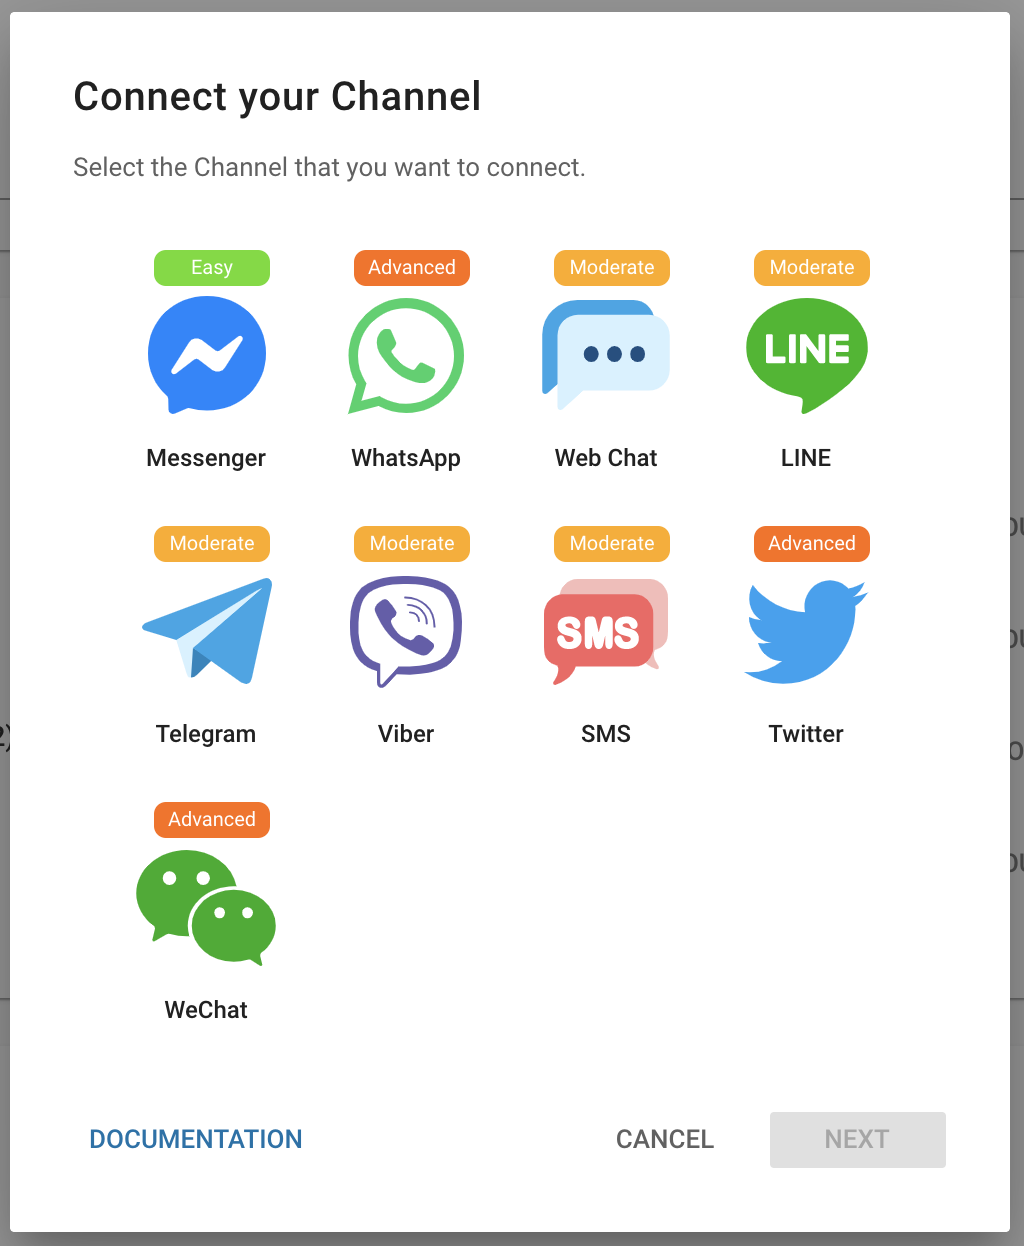
Adding New Channels
To add a new channel to your existing Space, press the blue "ADD CHANNEL" button on the top of this section. For more information on adding new channels, you can take a look at the Messaging Channels page.
Searching for a Channel
When the list of channels gets too long, you can use the search box to search for the channel that you are looking for. As you type in the search box, a listing of search results that matches your search query with the channel name will be shown if available.
Managing Channels
Next to each of your existing channels you will find a series of buttons.
Configure Channels
Press the blue "CONFIGURE" button to make changes to any of your existing channels.
You will be able to make changes to the Channel Name, which is how the channel is referred to internally on the platform. You will also be able to change the Greeting Message, which is an optional message that is shown to new contacts that first message you.
Additional options will also be available depending on the channel specific options.
Deleting Channels
To delete an existing channel, press the icon on the left of the Edit button that resembles a trash can and follow the instructions on screen. Doing so will completely remove the channel from your Space, along with any contacts that are from the channel.
Deleting a channel is a permanent action. We will not be able to recover any data after your channel is deleted.
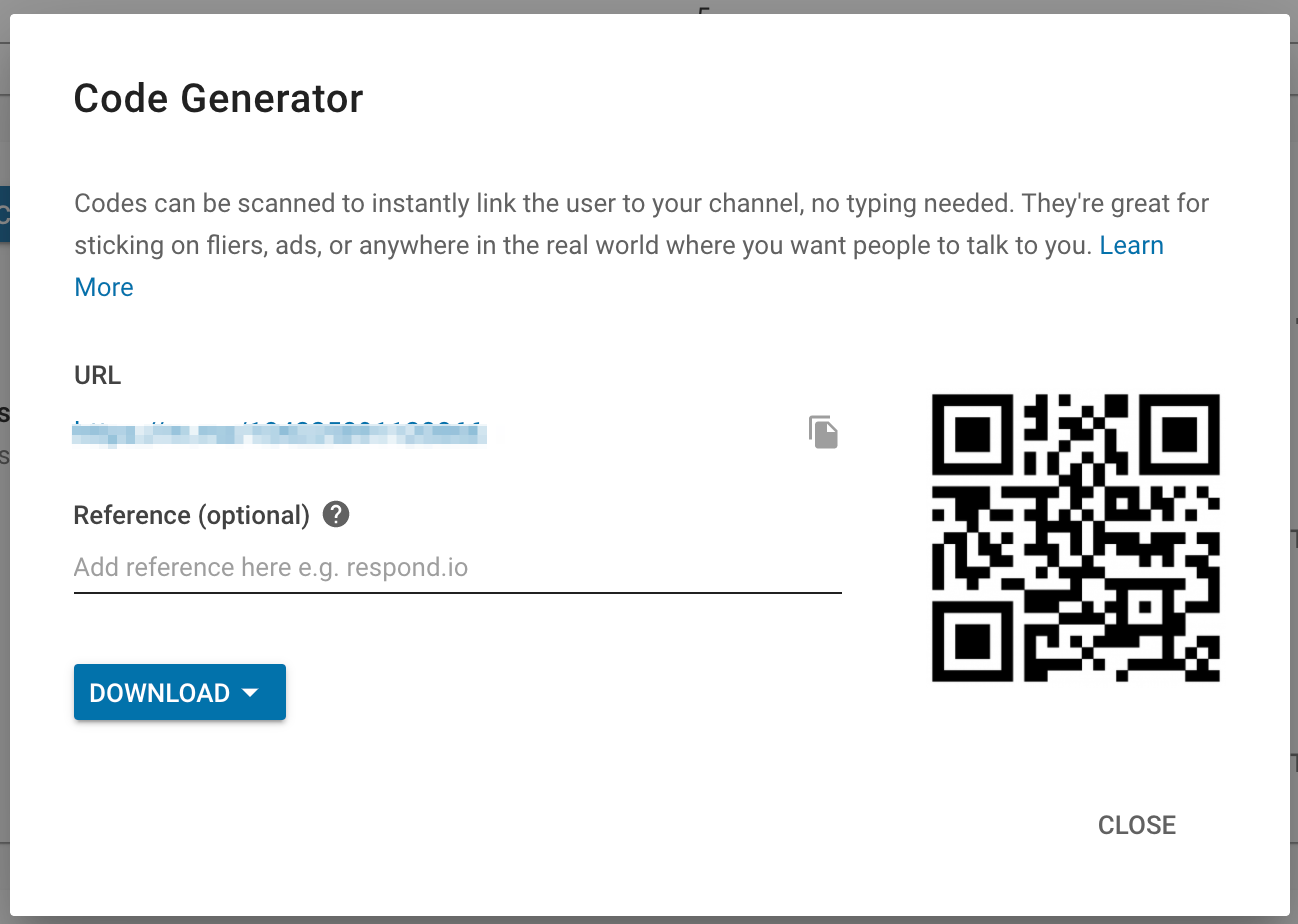
Generating Scannable Codes
If your channel supports Scannable Codes, URL and QR code can be generated by pressing the icon that resembles the focus lines on a camera. Pressing this button will open the Code Generator menu.
Different Channels provide different input fields that are either compulsory or optional to generate the code. Here is the list of the fields that are provided for each channel.
Reference appears in Messages of selected Contact as an in-line event, while Pre-Filled Text is an input suggestion when a contact starts a conversation.
Once you are ready, press the blue "DOWNLOAD" button and select your desired pixel dimensions to download your scannable code.
For more information on how to utilize this feature, you can read our blog article on using scannable codes here.
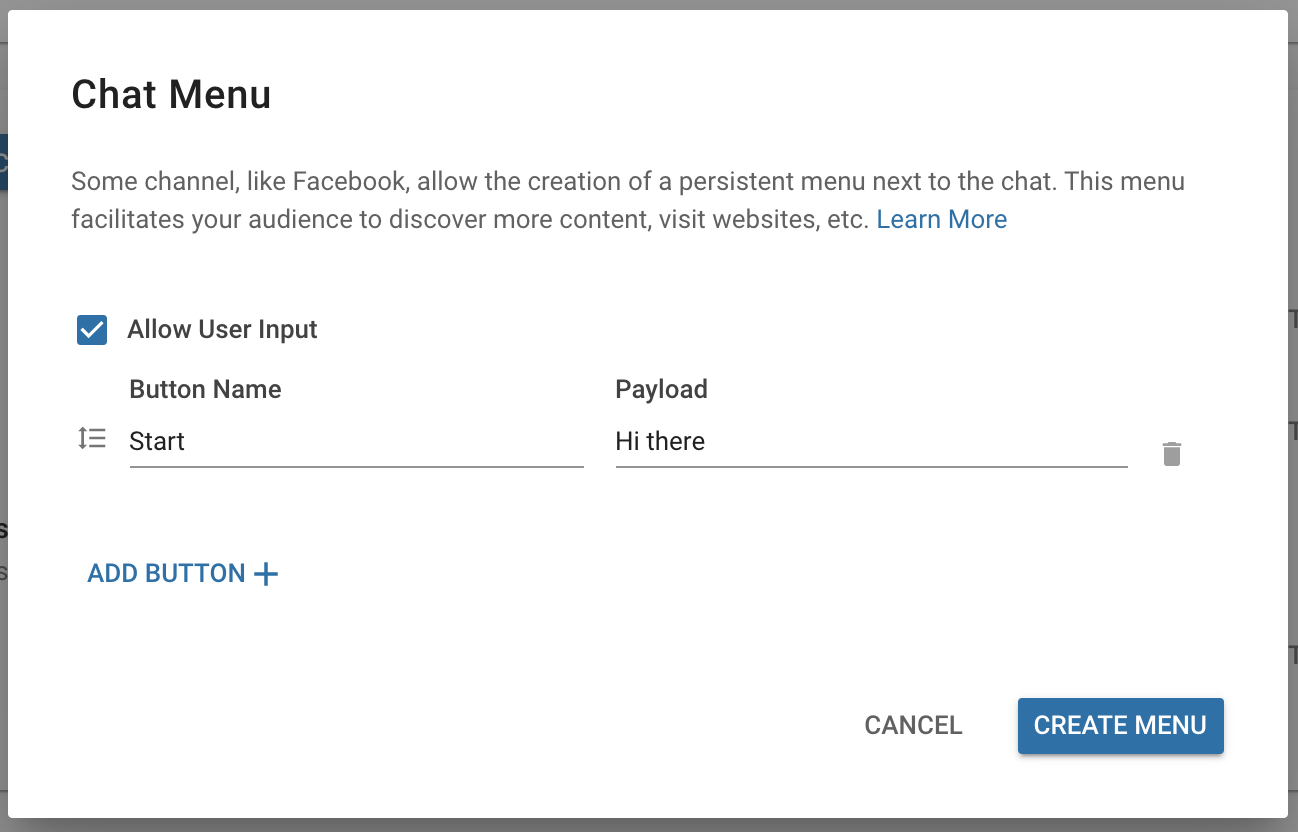
Creating a Chat Menu
If your channel supports the Chat Menu feature, you can create your own chat menu by pressing the icon that resembles several lines of options on a menu. Pressing this button will open the Chat Menu Creator.
Under the Chat Menu Creator, you can press the blue "ADD BUTTON" to start adding buttons to build your own chat menu.
For more information on Chat Menus, you can take a look at the Chat Menus page.
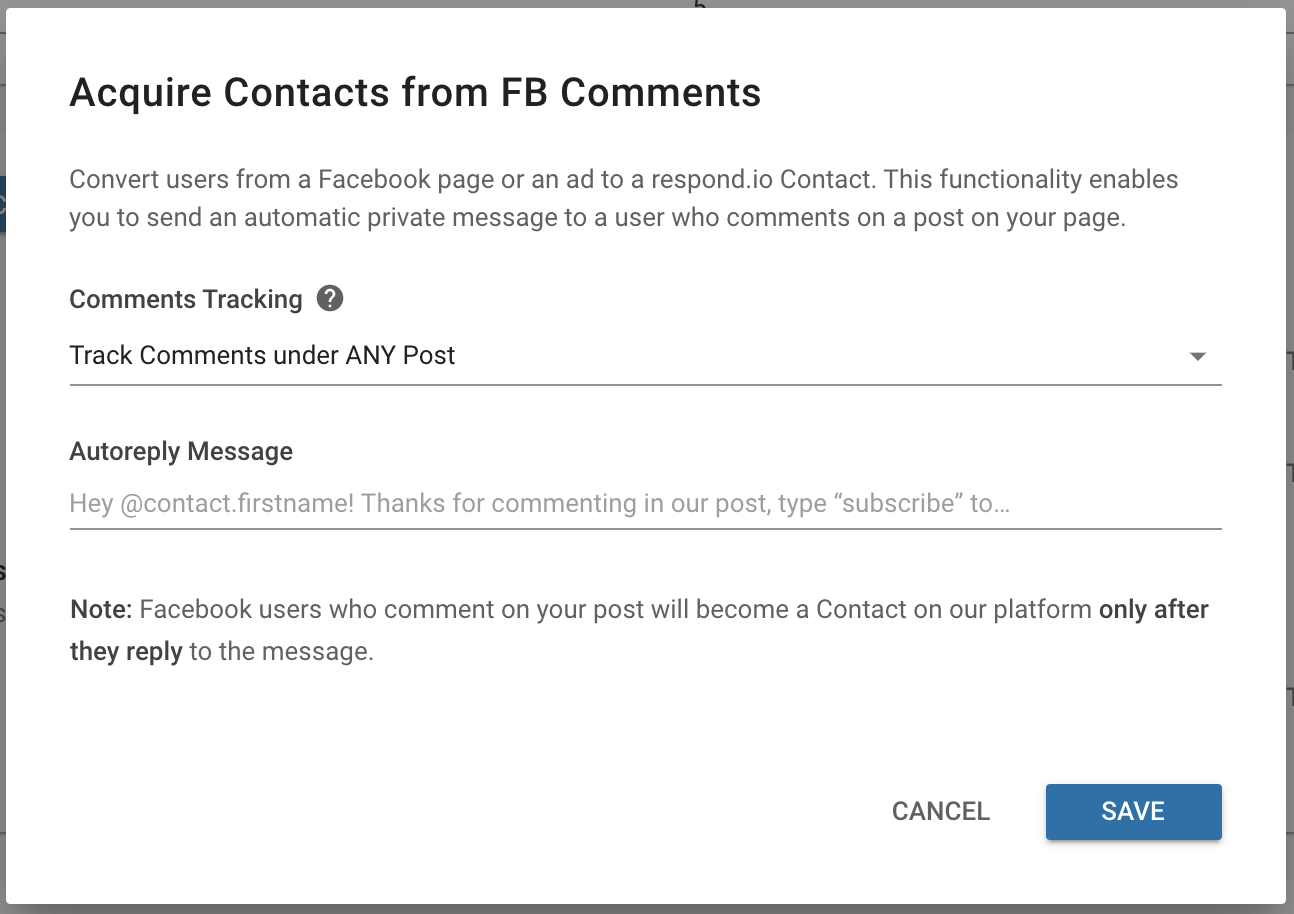
Acquiring Contacts from Post Comments
On Facebook Messenger, you can set up comment tracking for your Facebook Page or Ad campaign in order to convert users into messaging contacts.
For more information on acquiring contacts from Facebook comments, you can visit the documentation page here.
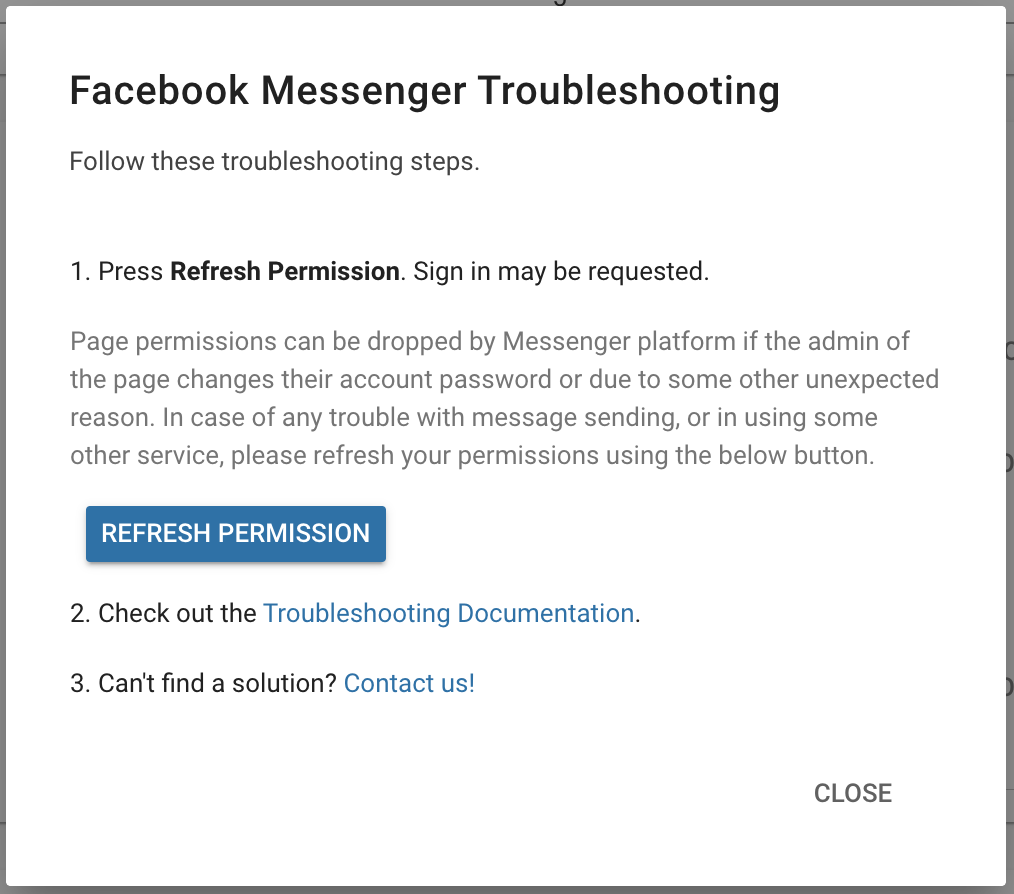
Troubleshooting
If you are having issues with the channels on the platform e.g., no incoming messages even channel is connected.
Press on the "TROUBLESHOOT" button of the channel and follow the instructions provided.
Issues with channels like Facebook and WeChat can be resolved quickly by just pressing "REFRESH PERMISSION" in the channel Troubleshooting.
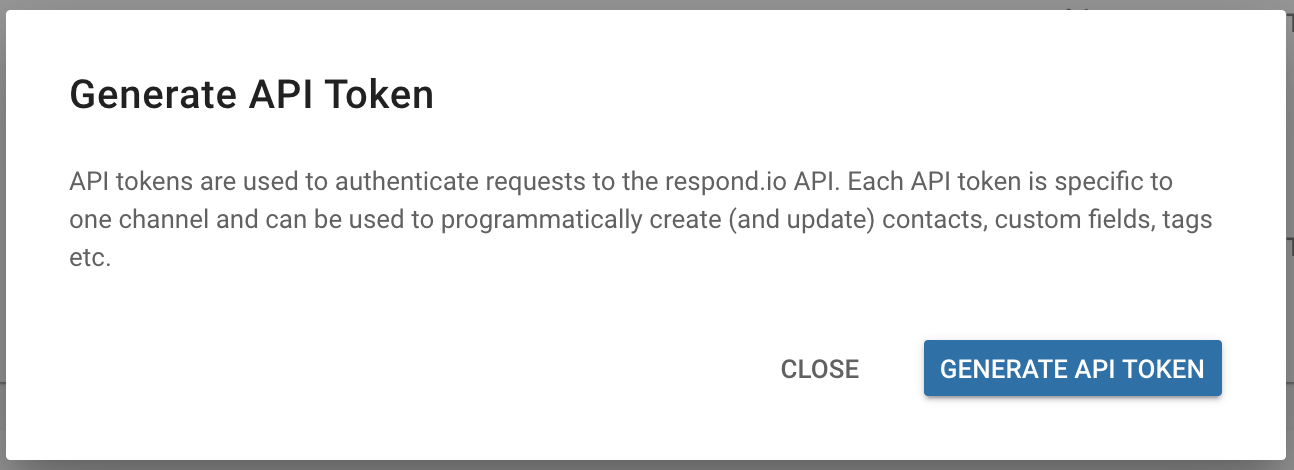
API Token
API tokens are used to authenticate requests to the YesHello API. Each API token is specific to one channel and can be used to programmatically create and update contacts, custom fields, tags and etc,.
To retrieve your channel API token, press on the "API" button of the channel.
Press the blue "GENERATE API TOKEN" to generate an API token.
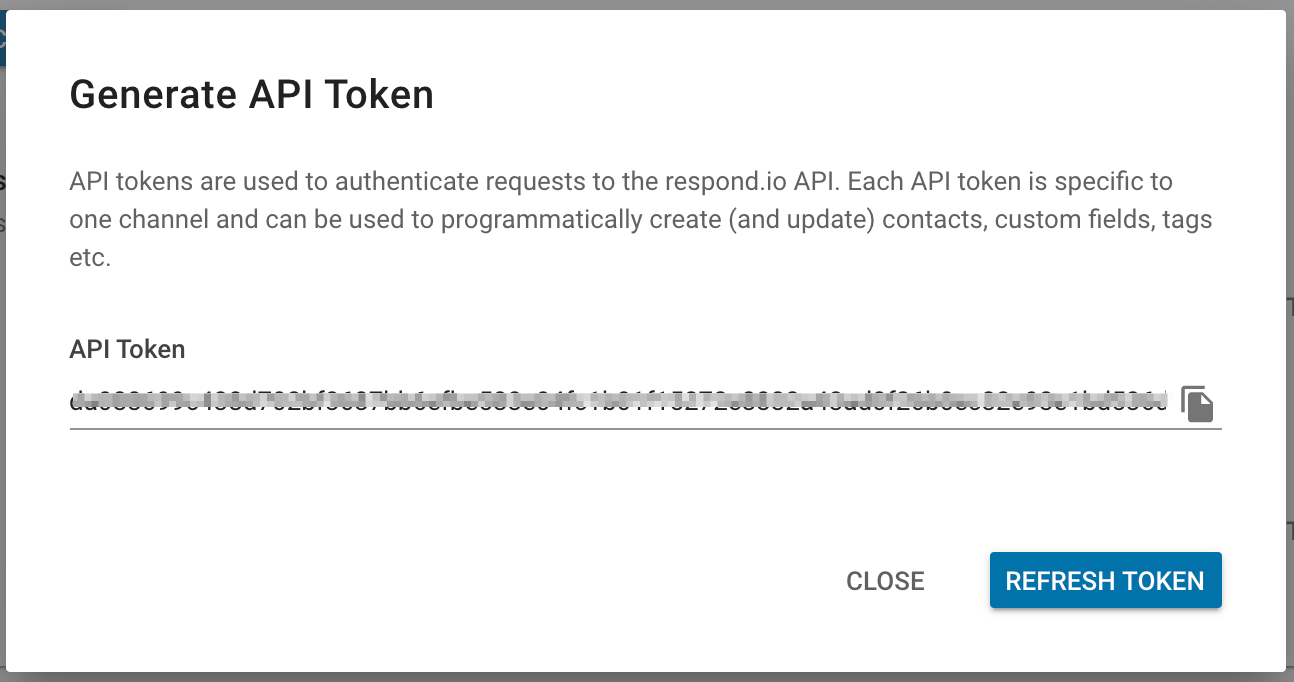
Once you have the API token, press "CLOSE".
If there is a need to change API Token, it can be refreshed here and the platform will then generate a different API token.
Last updated