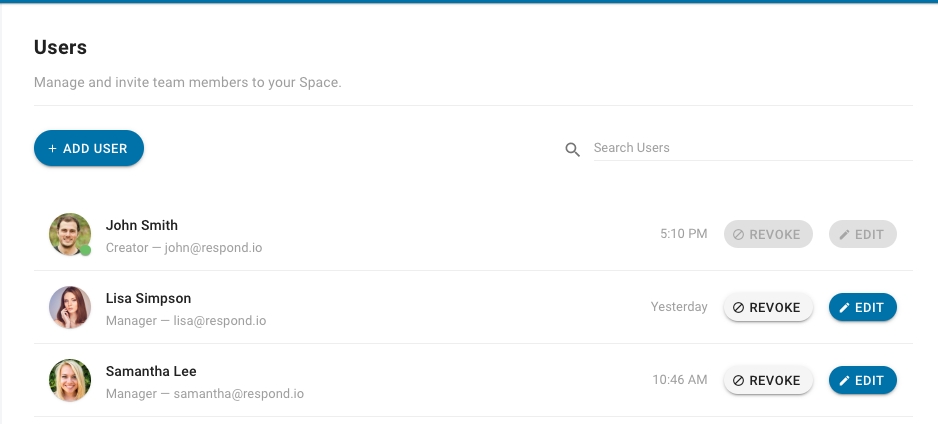
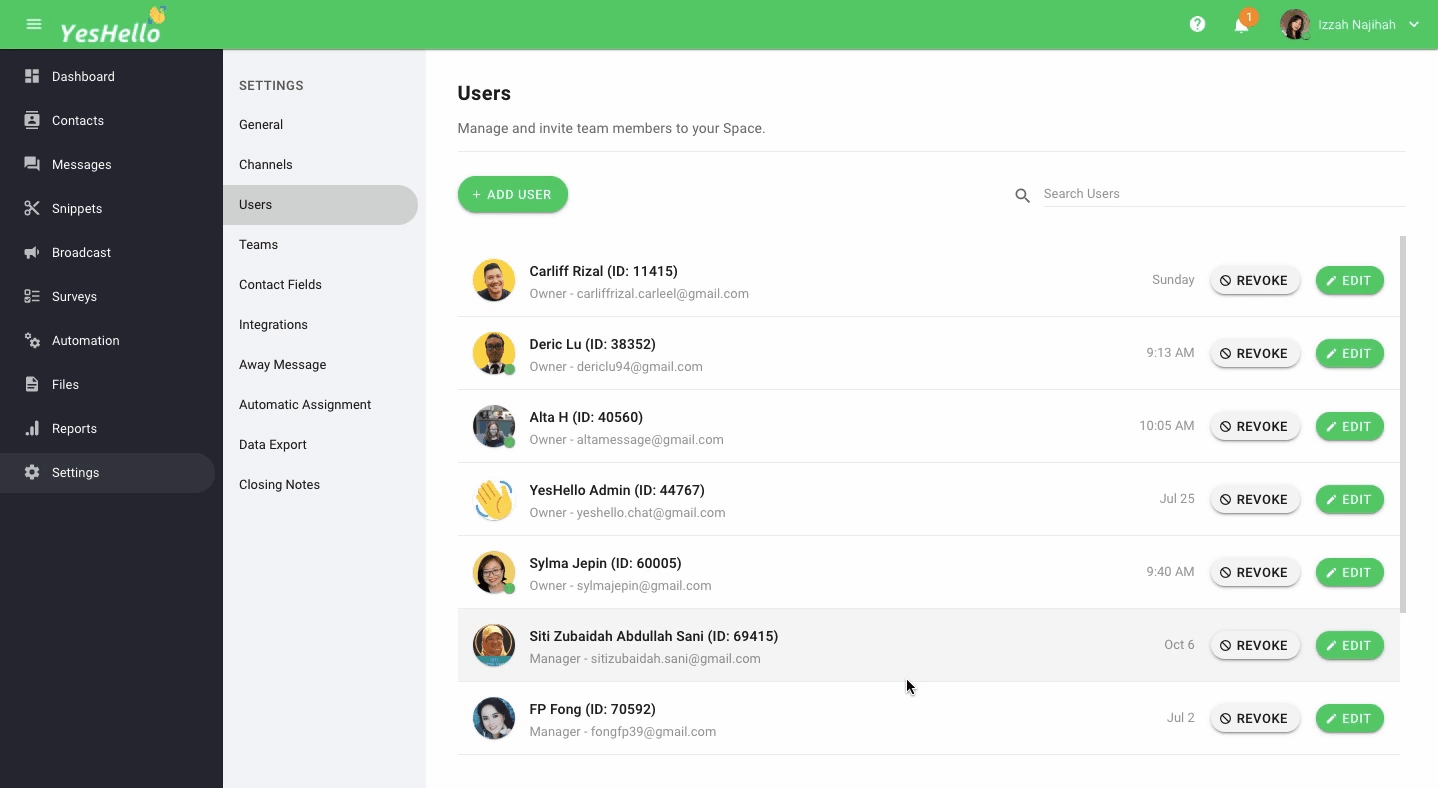
Users
Under the User Settings section, you can manage the users that have access to your Space.
Depending on your access level, you can change the access levels of other users or even revoke their access to your Space. From here, you can also invite new collaborators to help you manage your Space.
The online and away status can be seen here in realtime.
For each of the user, there is a last seen timestamp indicating the last time the user was on the platform. This is useful for Owner for the purpose of monitoring Agents.
For more information on each of the separate access levels, take a look here.
Adding New Users
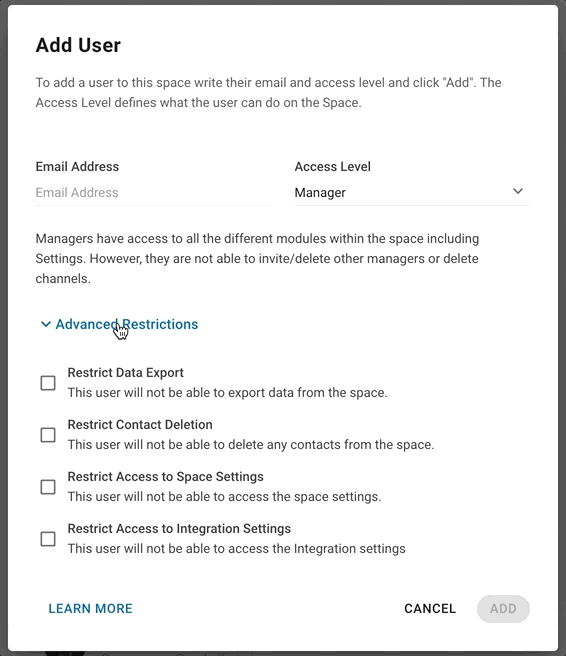
Step 1: Navigate to Users Settings From the Settings navigation menu, select Users from the menu
Step 2: Press ADD USER At the top bar, press the blue ADD USER button and the Add User dialog should open up.
Step 3: Fill in the email address Enter the email address of the user that you wish to invite into the Email Address field.
Step 4: Select Access Level Select an appropriate Access Level for this new user.
Read up more on Access Level!
Step 5: Check any restrictions that apply For Managers and Agents, advanced restrictions may be applied if necessary depending on your organization needs.
Step 6: Submit the details Once you have filled out the fields, press on the blue ADD button on the bottom right.
An invitational email will be sent to the user's email address that you entered. The new user will have to click on a link embedded in the invitation email to gain access to the space.
IMPORTANT: When you add a user to the space, the user will be added to the organization if they have not been added to the organization.
Managing Users
A user cannot revoke or edit his own access. It requires another user with the privilege to do so.
Revoking Access
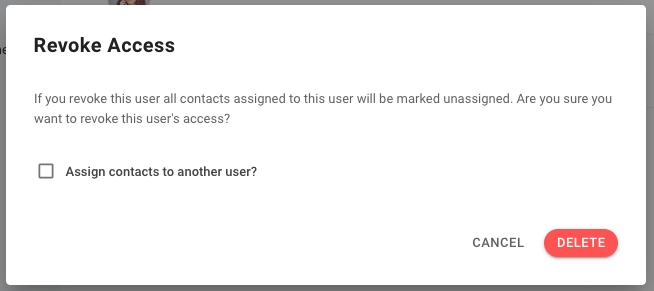
To revoke a user's access to your Space, press their respective Revoke Access button. This will open up the Revoke Access menu.
Revoking a user's access will remove them from your Space. By default, any contacts that were previously assigned to this user will be marked as unassigned. If you want these contacts to be assigned to another user, you can enable the checkbox option and select a user to assign contacts to from a dropdown menu.
When revoking a user's access, their access to the organization will remain. If you need to remove them from the organization, please refer to this guide.
Be careful when you revoke a user's access. This action cannot be undone.
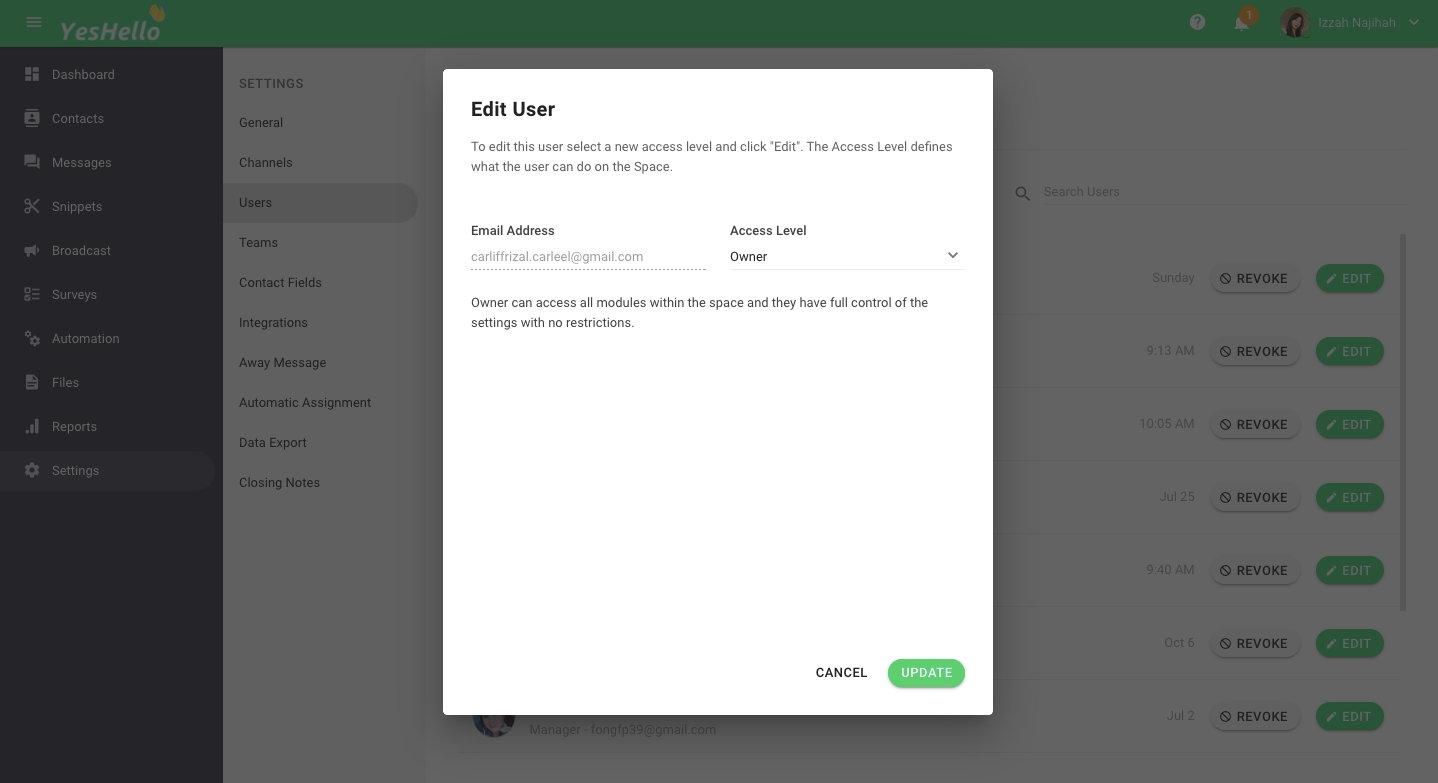
Editing Users
Press the blue EDIT button to make changes to any of your existing users on your Space. This will open up the Edit User menu.
You can only make changes to a user's access level. Once you are done, press the blue UPDATE button to save any changes that you made.
Last updated