Surveys
Look through the collected data and create new surveys.
The Surveys Module allows you to browse through the results of your past surveys. From here, you can also create new surveys to be sent out. You can navigate to the Surveys Module using the navigation menu on the left of the platform. Look for the icon that resembles a list of questions.
Surveys are best used to quickly and automatically collect information from a large volume of your contacts. By sending surveys are able to collect and record qualitative data as well as save important information as custom fields.
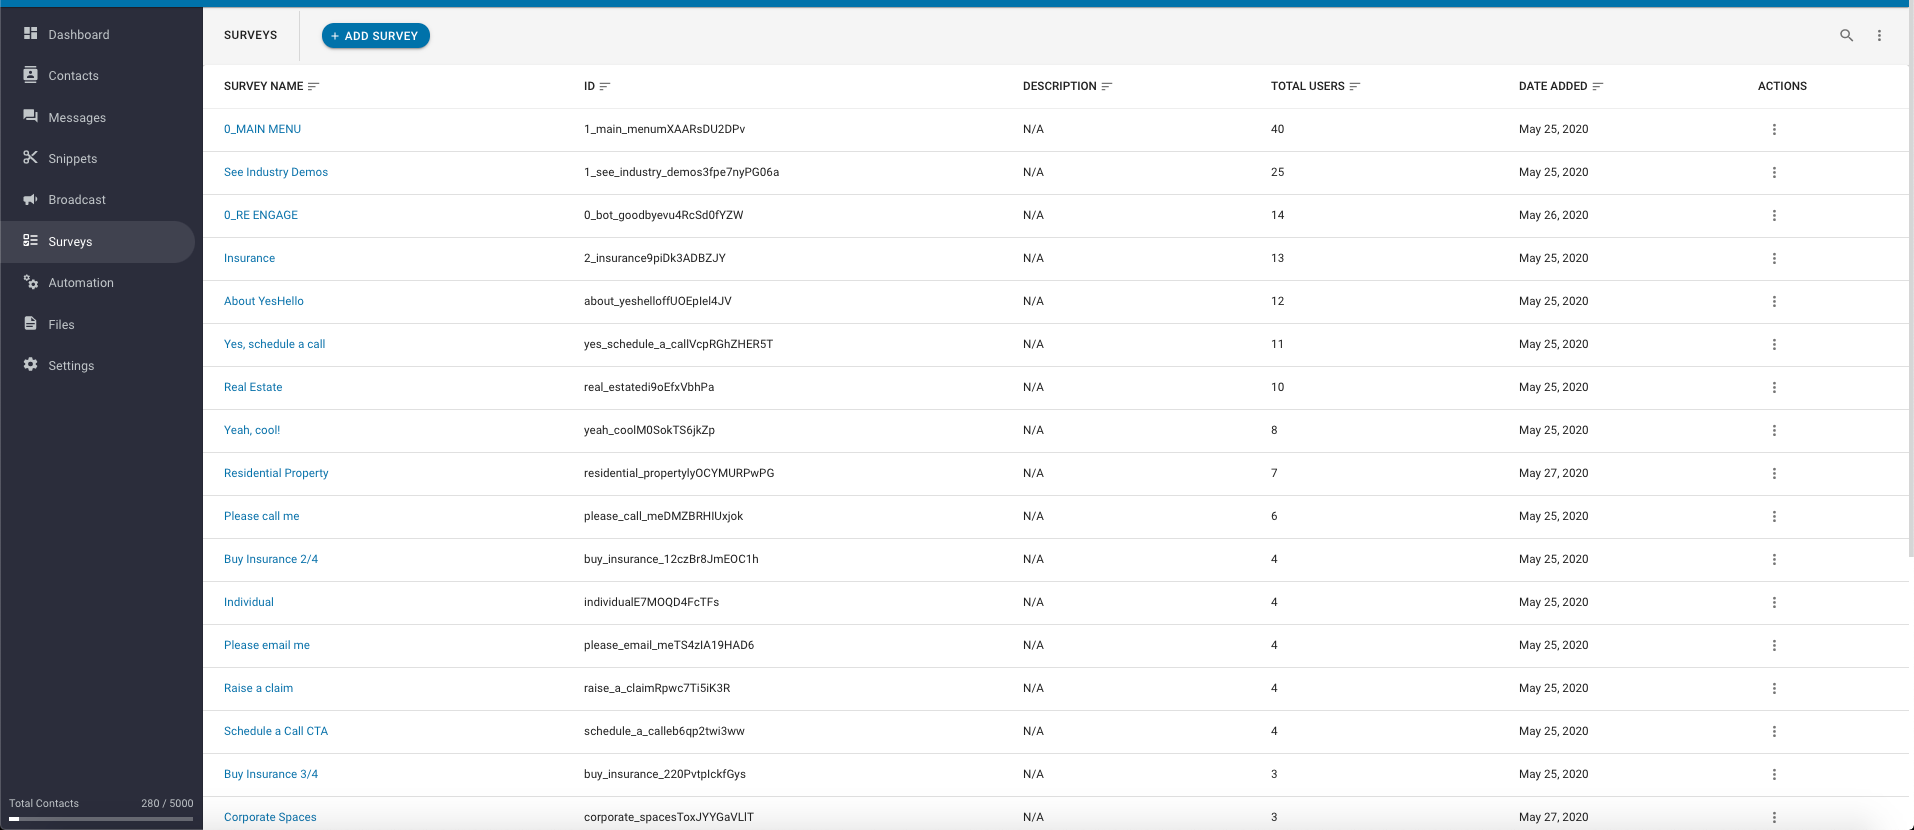
Surveys Overview
From this table, you can see a summary of all the surveys that have been added to the platform.
You can use the search bar at the top of the Surveys Module to quickly find the survey that you are looking for.
More Actions
The more actions button allows you to access a dropdown menu of additional things you can do with each of the surveys. The More Actions button is on the far right. Look for three vertical dots.
From this dropdown menu you will be presented with several options:
Survey Results: Select this option to open up the Survey Results page.
Edit Survey: By pressing this, you will open up the Edit Survey Menu.
Delete: This option allows you to permanently delete a survey along with all of its collected data.
Be careful, deleting a survey is irreversible. We cannot help you retrieve any survey data that has been deleted accidentally.
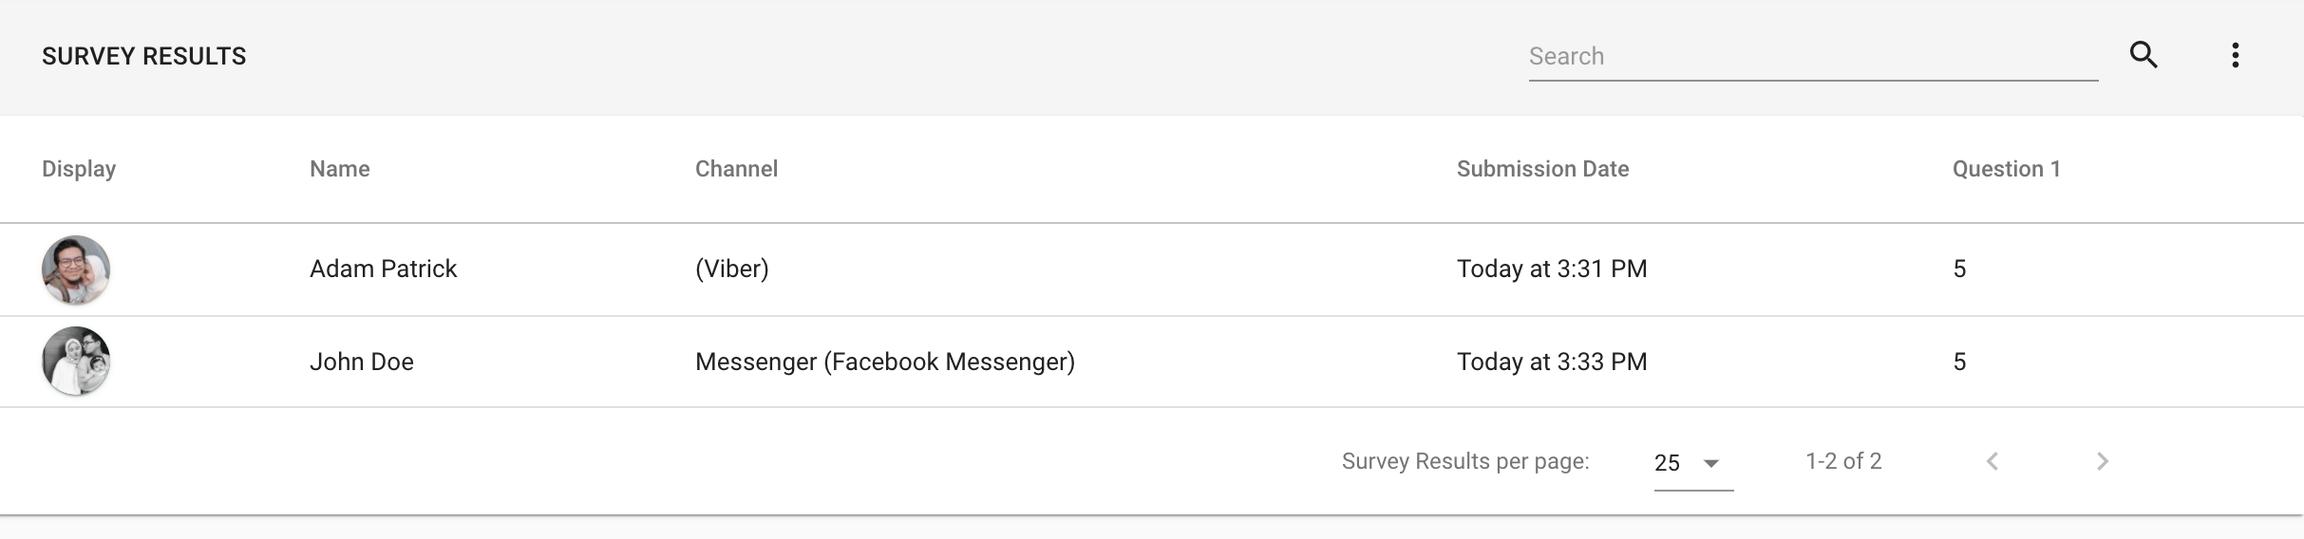
Viewing Survey Results
You can view a list of the responses to a specific survey by accessing its Surveys Results page. Navigate to this page by selecting "Survey Results" under the More Actions dropdown menu on the right. Look for the three vertical dots.
Quickly look for specific responses by using the search bar at the top.
Creating a New Survey
To create a new survey on the platform, you will need to access the New Survey Menu. This can be done by pressing the blue "ADD SURVEY" button at the top left of the page.
Upon receiving a survey, contacts are automatically asked the survey questions. The contact's responses will then be recorded onto the platform.
Name and Description
You will have to enter a name for your new survey along with a short description in the first two fields, respectively.
Adding Questions
To define your questions, open up the question tab to begin editing.
Field Name
This is the name that each response will be recorded as when you view survey results on the platform.
Be sure to label each field so that survey results are easily readable.
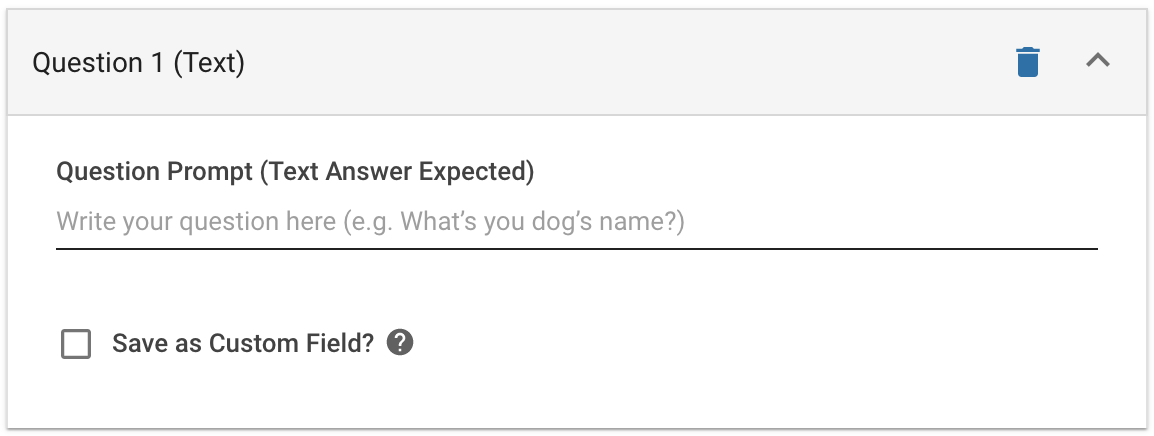
Question Prompt
The Question Prompt is the actual question message that the contact will see.
Try to be concise and specific so the contact can understand exactly what you are asking.
Saving as Custom Field
In addition to saving the response to the survey results on the platform, you also have the option of saving it into an existing custom field.
You may want to save important information about the contact that's useful outside of the survey, such as their email address or phone number, as custom fields. This way, this information becomes easily accessible under their contact profile.
Adding Additional Questions
You can continue to add more questions to the survey by pressing the blue "ADD QUESTION" at the bottom.
You can simply drag the questions around if you wish to reorder the questions in your survey!
Response Format
This allows you to select the expected response format to your question.
Any answer that does not conform to the selected response format will be rejected.
Fallback Message
If the contact's response does not match the response format, you have the option to send them a Fallback Message.
This is useful for restating the question more clearly or to be more specific on the expected response format.
Survey is automatically cancelled when Users fail to appropriately answer survey questions three times in a row to prevent them from prompted again.
You can also add multiple fallback messages by pressing the blue plus button, in which case a random Fallback Message will be chosen each time.
If this is left blank, the platform will simply restate the original question once more.
Survey Success Message
Whatever you put in as the success message will be displayed to contacts once they complete the survey.
This is useful to let prompt your contact that the survey is finished. For example, you can thank them for their time and contribution.
Survey Error Message
This message will be displayed to any contacts that exit the survey early.
Contacts that do so on purpose usually do not wish to complete surveys. You may want to use this message to apologize or inform the contact on how to opt out of future surveys to prevent a bad user experience.
Remember that if the user trips the fallback three times in a row, they are automatically exited from the survey.
Sending Surveys
To manually send out surveys to individuals, you can press the Send a Survey Button in the composer bar in the Messages Module.
Alternatively, you can set up surveys to send automatically using the Automation Module.
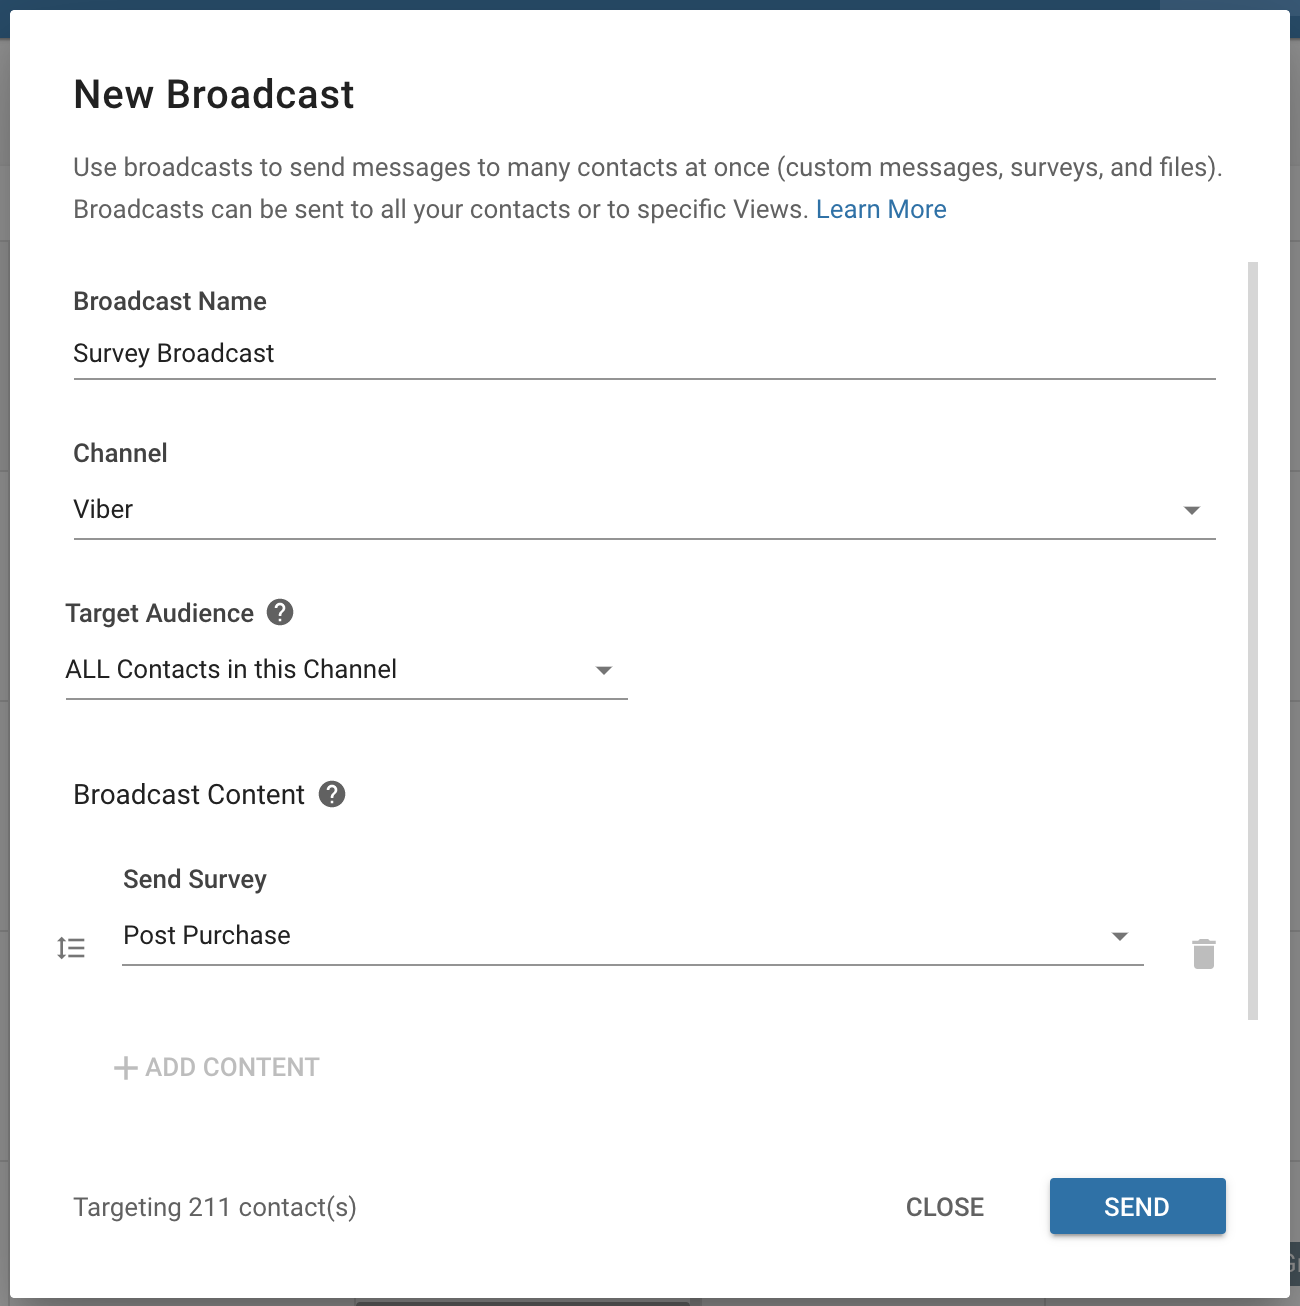
To send out the survey to a large number of your contacts, you can use the Broadcasts Module.
Create a new broadcast and select the "Send Survey" as broadcast content. Choose the survey that you wish to send from the dropdown menu. Once you have selected your desired audience, you can press the "SEND" button to send out the survey to your contacts.
For more information on sending broadcasts, be sure to check out the Sending a New Broadcast guide.
Editing an Existing Survey
You can update any existing survey by pressing the "Edit" button under the More Actions dropdown menu.
From here, you can change and alter the details of the selected survey.
Remember to hit the "UPDATE" button to save your changes.
Deleting a Survey
If a survey is no longer relevant or it went out of context, it can be deleted from the space by choosing Delete from the actions menu.
When you delete a survey, the responses will be deleted too.
Be careful when you delete a survey as it may be used by other users in the space. Bear in mind that the deletion cannot be undone.
Last updated