Connect YesHello to Twitter.
Twitter is an American online news and social networking service on which users post and interact with messages known as "tweets". As of 2016, Twitter had more than 319 million monthly active users and is one of the top 10 most visited websites.
Setting Up Twitter
In order to connect Twitter to your Space, you will need the following:
Note that new developers must apply using their Twitter Account and wait for approval from Twitter.
Creating an Twitter App
First, you must create an App on Twitter for your Space to connect to. Head over to the Twitter App Dashboard and log in with your Twitter Developer Account.
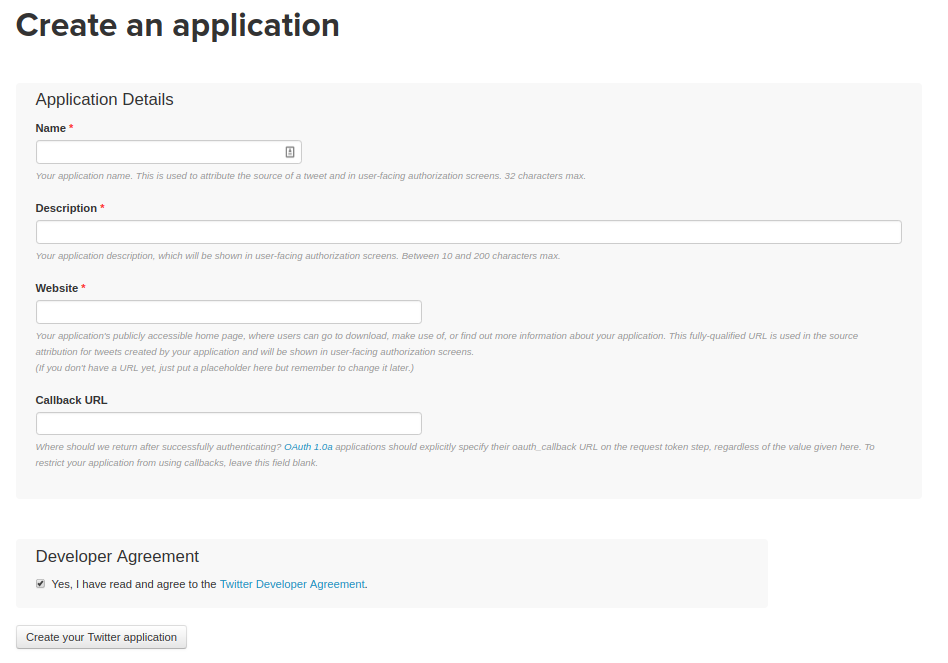
Under the Twitter App Dashboard, press the "Create an App" button to create a new Twitter App. You should be prompted to fill in some information about your new Twitter App under the Application Details section.
Once you have filled in the required fields, accept their Terms and Conditions under the Developer Agreement section. Finally, press the "Create your Twitter Application" button to create your Twitter App.
Enabling Permissions
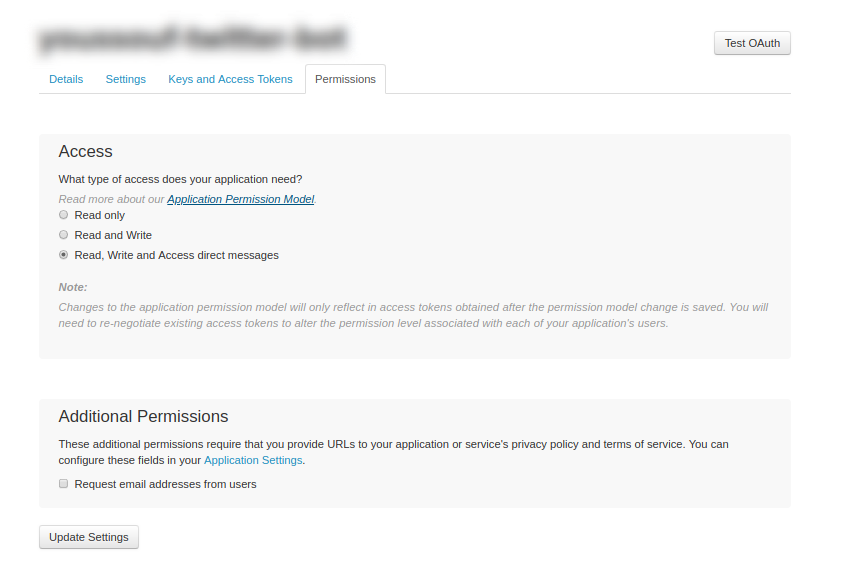
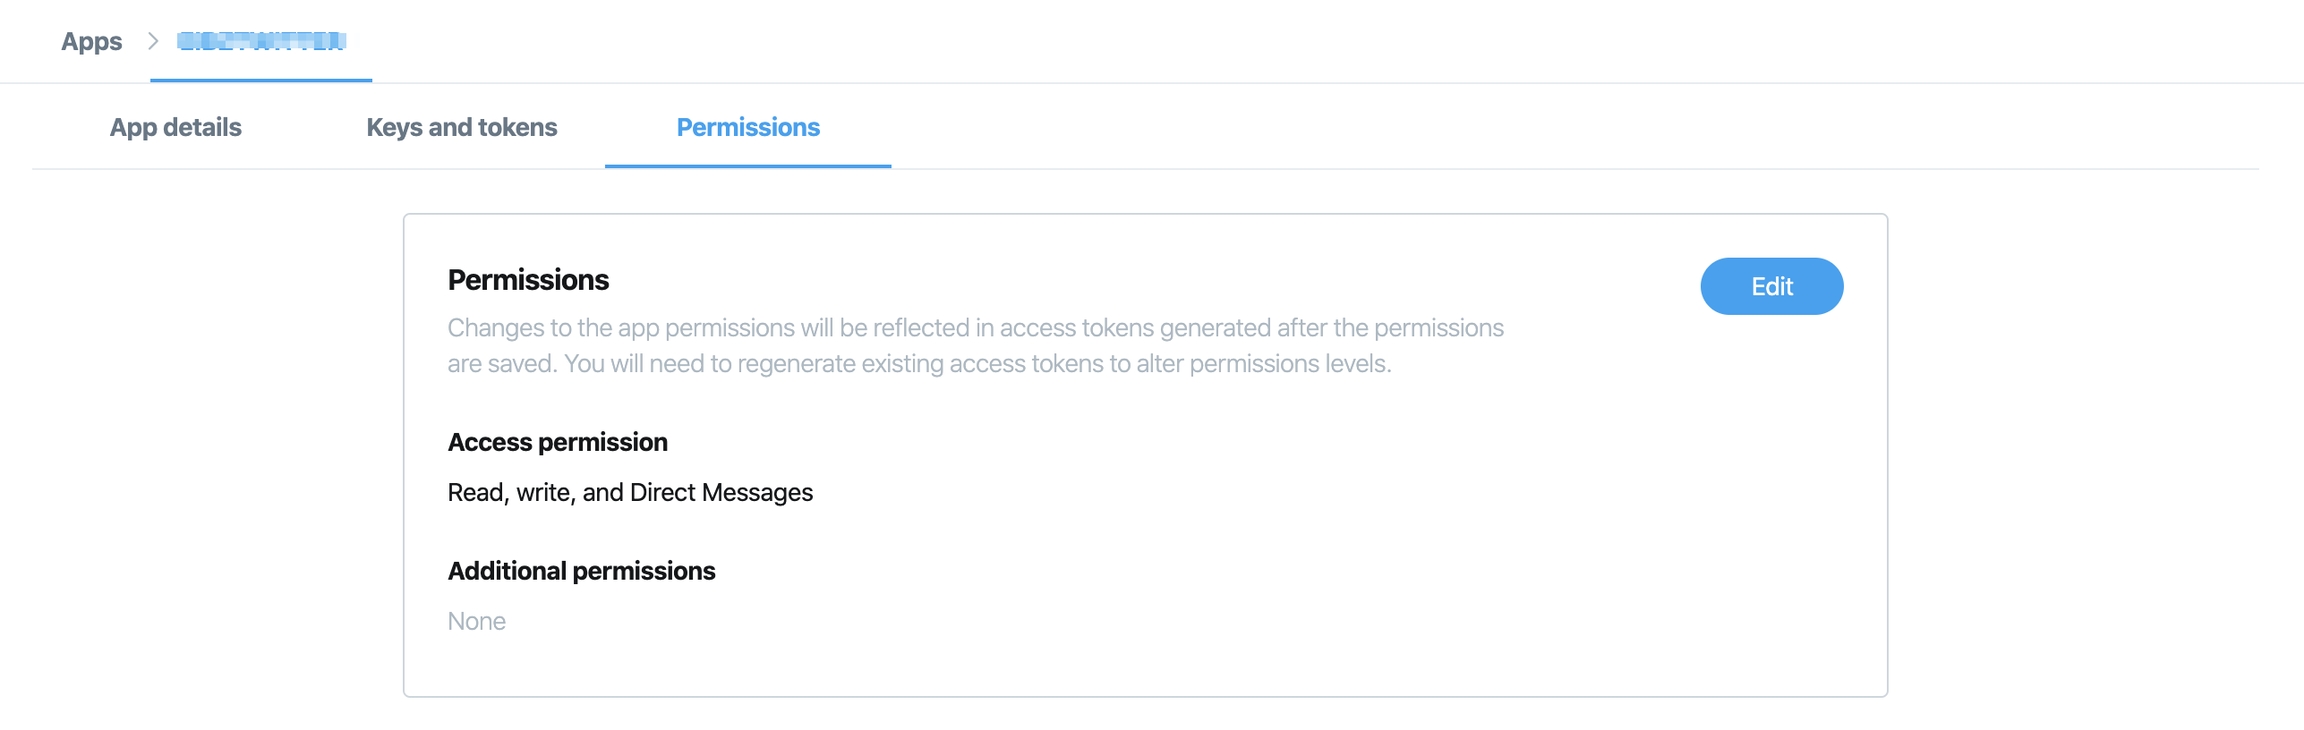
Now that you have created your Twitter App, there are some permissions you must enable. On the Twitter App Dashboard, select the "Permissions" tab. Under the "Permissions" tab, press the "Edit" button to start making changes.
From the Permissions area, select the "Read, write, and Access direct messages" option. Then press the "Update Settings" button at the bottom of the page to save your changes.
Setting up a Dev Environment
For the YesHello Platform to connect to your Twitter App, you must also create a Dev Environment on Twitter.
Navigate to the Twitter Dev Environments page and press the "Set up Dev Environment" button under the Account Activity API section to set up a Dev Environment.
You will have to input the Twitter App ID of the Twitter App you just created.
Once you have set up your Dev Environment, take note of your Dev Environment Label. You will need to later when connecting your Space to Twitter.
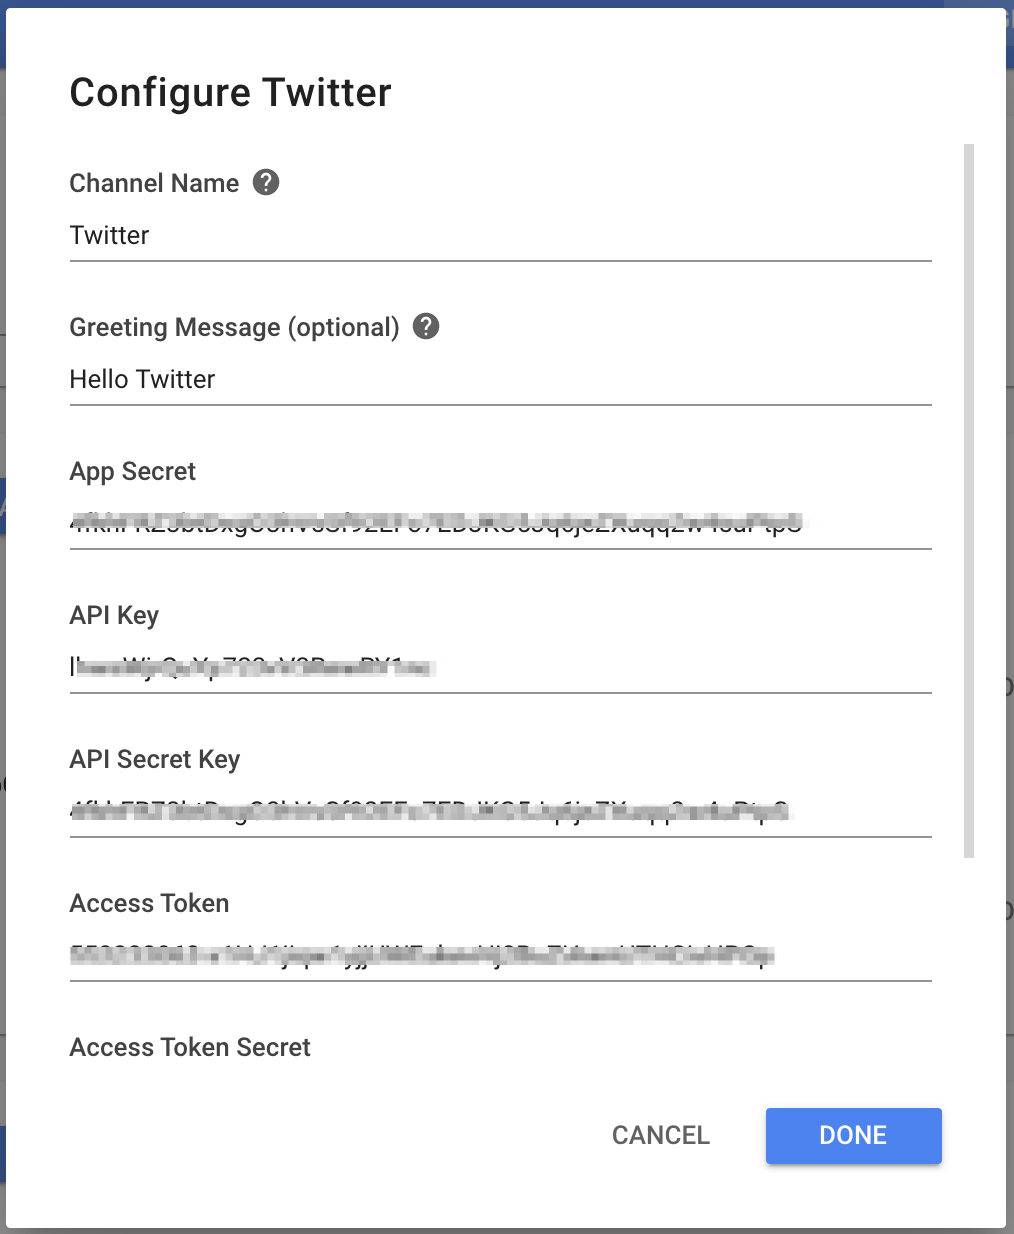
Connecting Twitter
1. Navigate to Settings > Add Channel > Twitter.
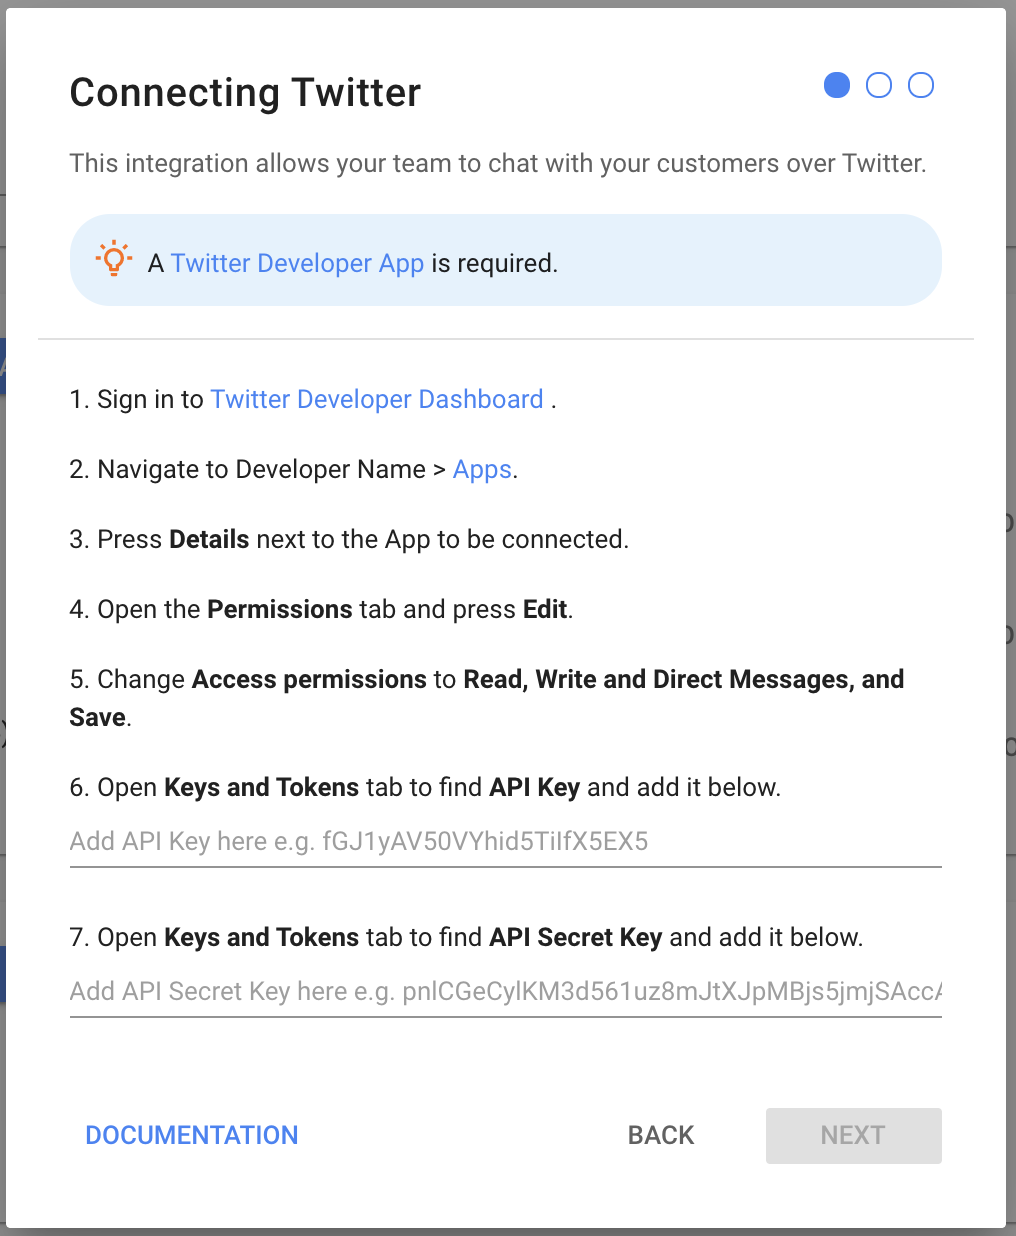
2. Sign in to Twitter Developer Dashboard .
3. Navigate to Developer Name > Apps.
4. Press Details next to the App to be connected.
5. Open the Permissions tab and press Edit.
6. Change Access permissions to Read, Write and Direct Messages, and Save.
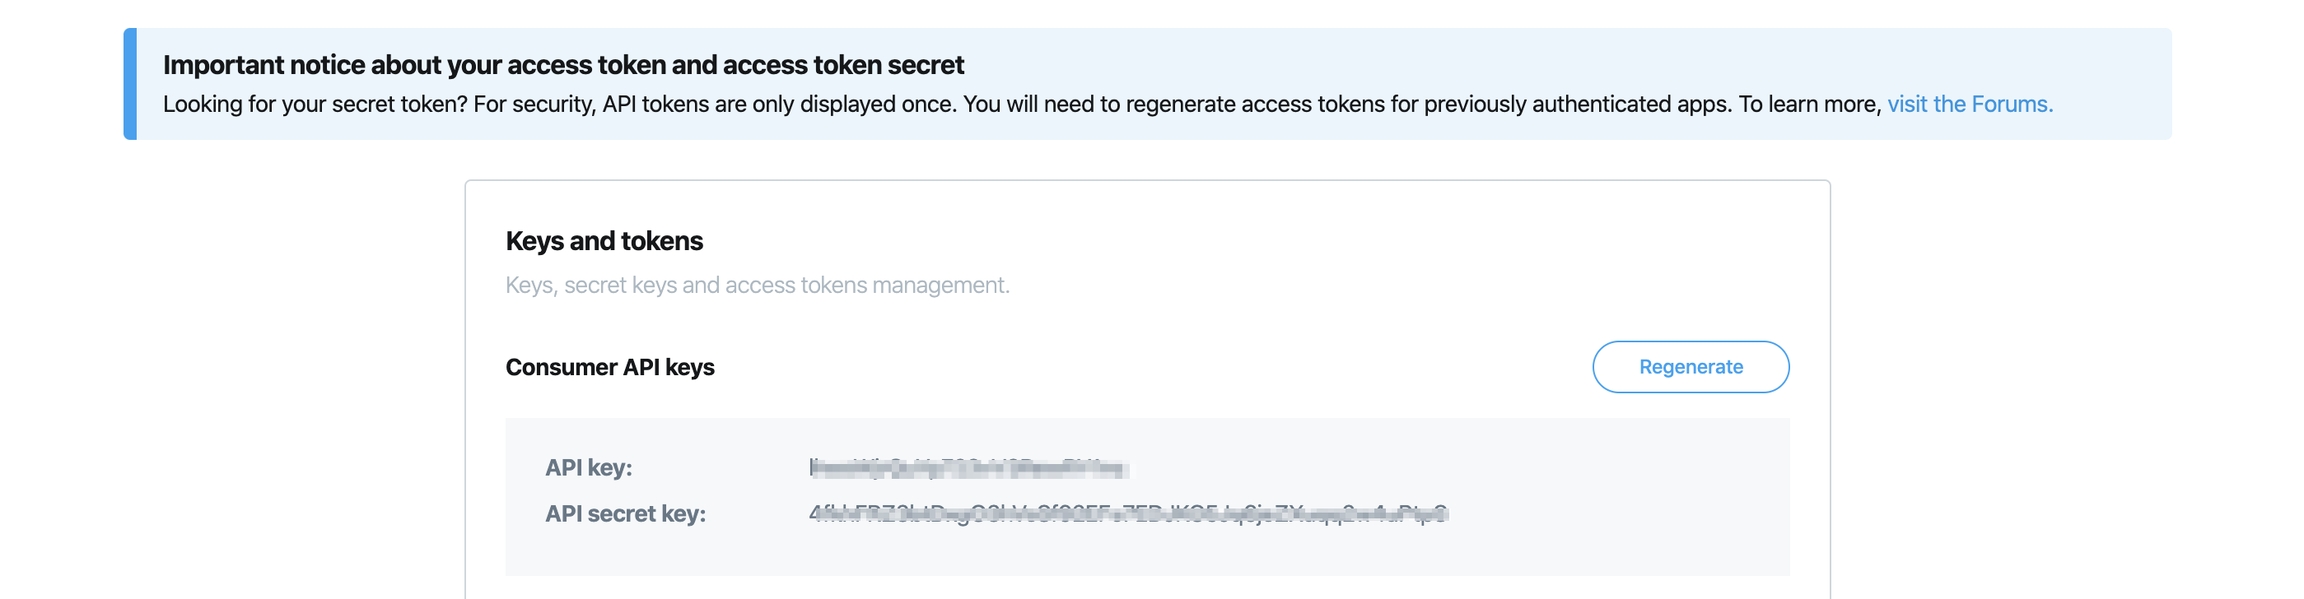
7. Open Keys and Tokens tab to find API Key and add it in the field provided.
8. Open Keys and Tokens tab to find API Secret Key and add it in the field provided.
9. Press Next.
10. Open Keys and Token Tab.
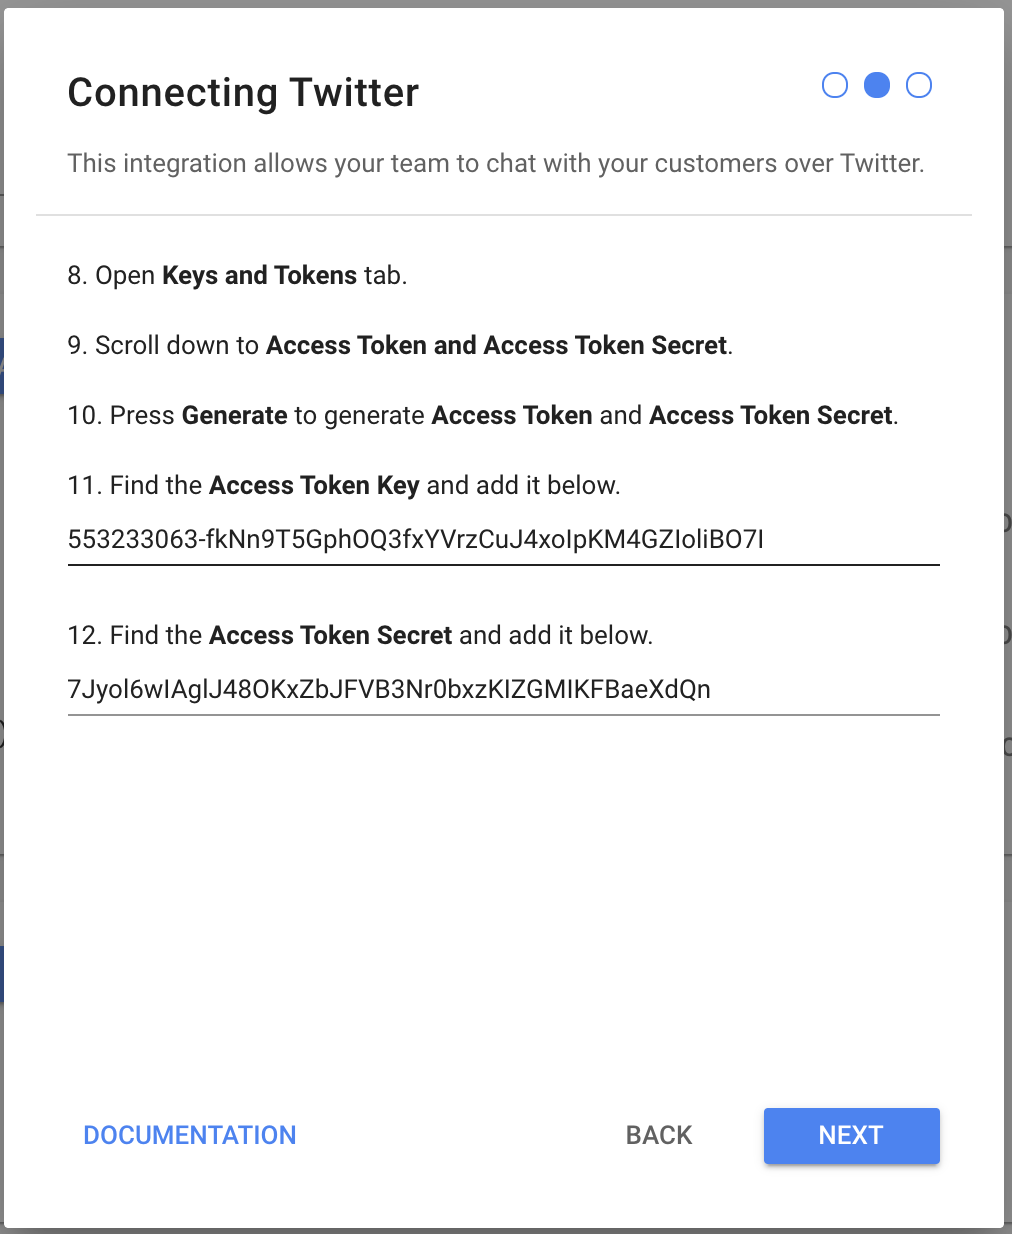
11. Scroll down to Access Token and Access Token Secret.
12. Press generate to generate Access Token and Access Token Secret.
13. Find the Access Token Key and add it in the field provided.
14. Find the Access Token Secret and add it in the field provided.
15. Press Next.
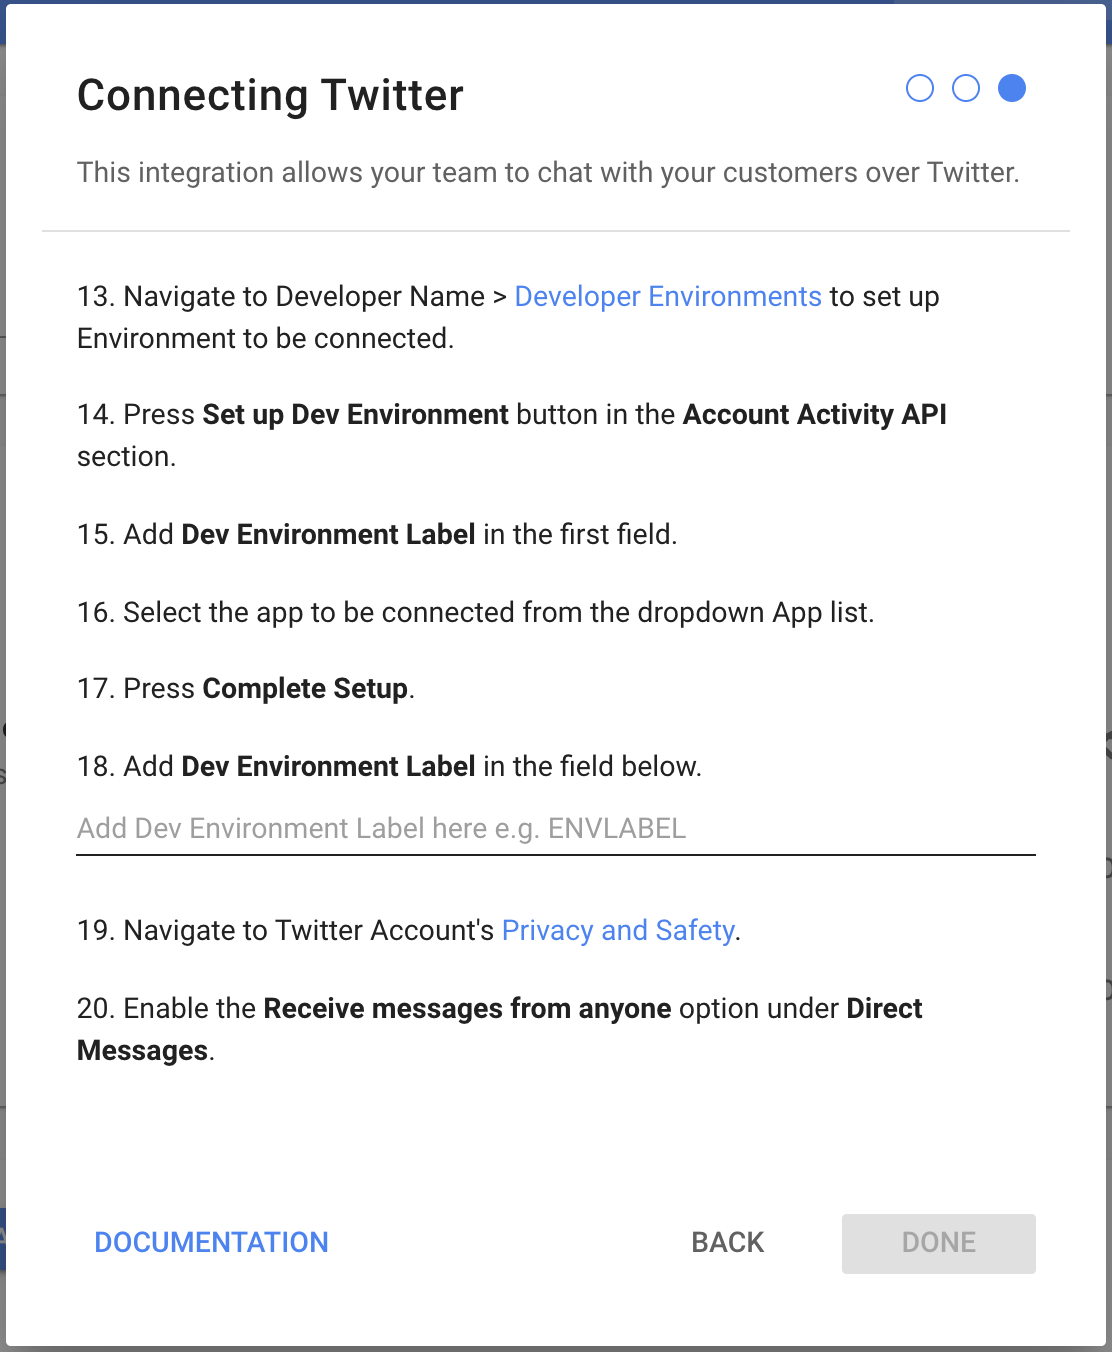
16. Navigate to Developer Name > Developer Environments to set up Environment to be connected.
17. Press Set up Dev Environment button in the Account Activity API section.
18. Add Dev Environment Label in the first field.
19. Select the app to be connected from the dropdown App list.
20. Press Complete Setup.
21. Add Dev Environment Label in the field provided in the platform.
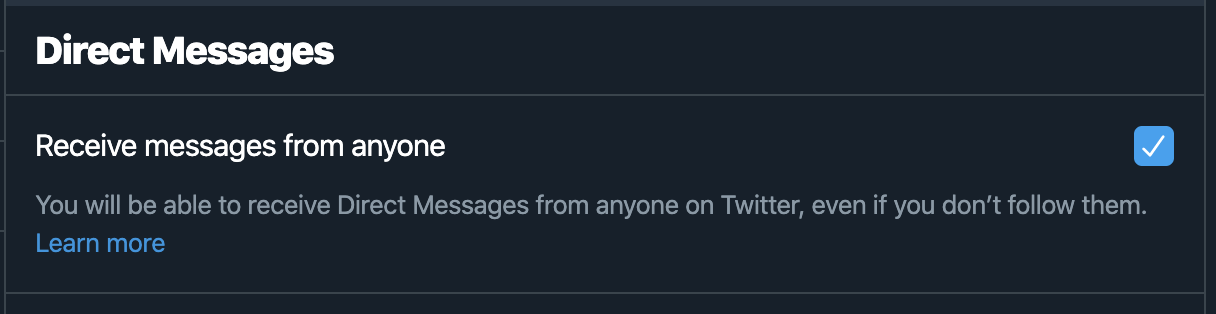
22. Navigate to Twitter Account's Privacy and Safety.
23. Enable the Receive messages from anyone option under Direct Messages.
24. Press Done.
Any direct messages sent to your Twitter Account will now be received in your Space on the YesHello Platform.
Channel Configuration
Every Twitter channel connected can be configured with a unique:
Channel Name
Greeting Message
1. Navigate to Settings > Channel Settings.
2. Find the Twitter channel to configure.
3. Press the blue Configure button.
4. Configure the channel.
5. Press Done.
Your Channel Name and/or Greeting Message has been edited.
Troubleshooting
Still having trouble with the channel? Contact us here!
Last updated