Install on Shopify
Installing a web chat widget on your Shopify store.
Adding a web chat widget on your Shopify store is a quick and easy process. It does not require any coding skills or technical knowledge.
Setting Up for Installation
In order to install a web chat widget on Shopify, you will need the following:
Access to your Shopify account
A code snippet for your web chat widget
If you don't have a code snippet already, you will generate one when creating a YesHello Website Chat Widget or using the Facebook Chat Plugin for Facebook Messenger.
If you have the channels already connected on the YesHello Platform and you need to retrieve the generated code snippet, navigate to the Manage Channels section under Settings. Press the respective blue "Edit" button to find the generated script.
Installing on Shopify
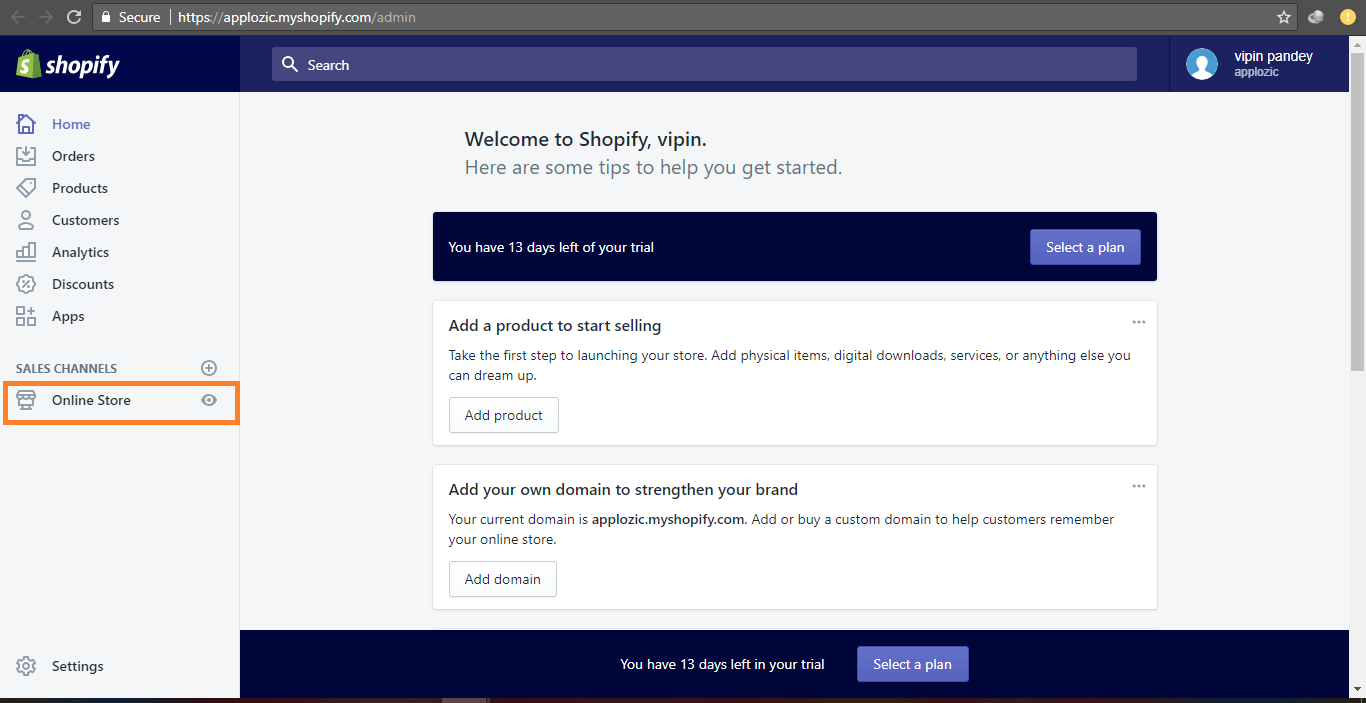
Step 1: Log in to Shopify
Log in to your Shopify account and click on "Online Store" on the navigation bar.
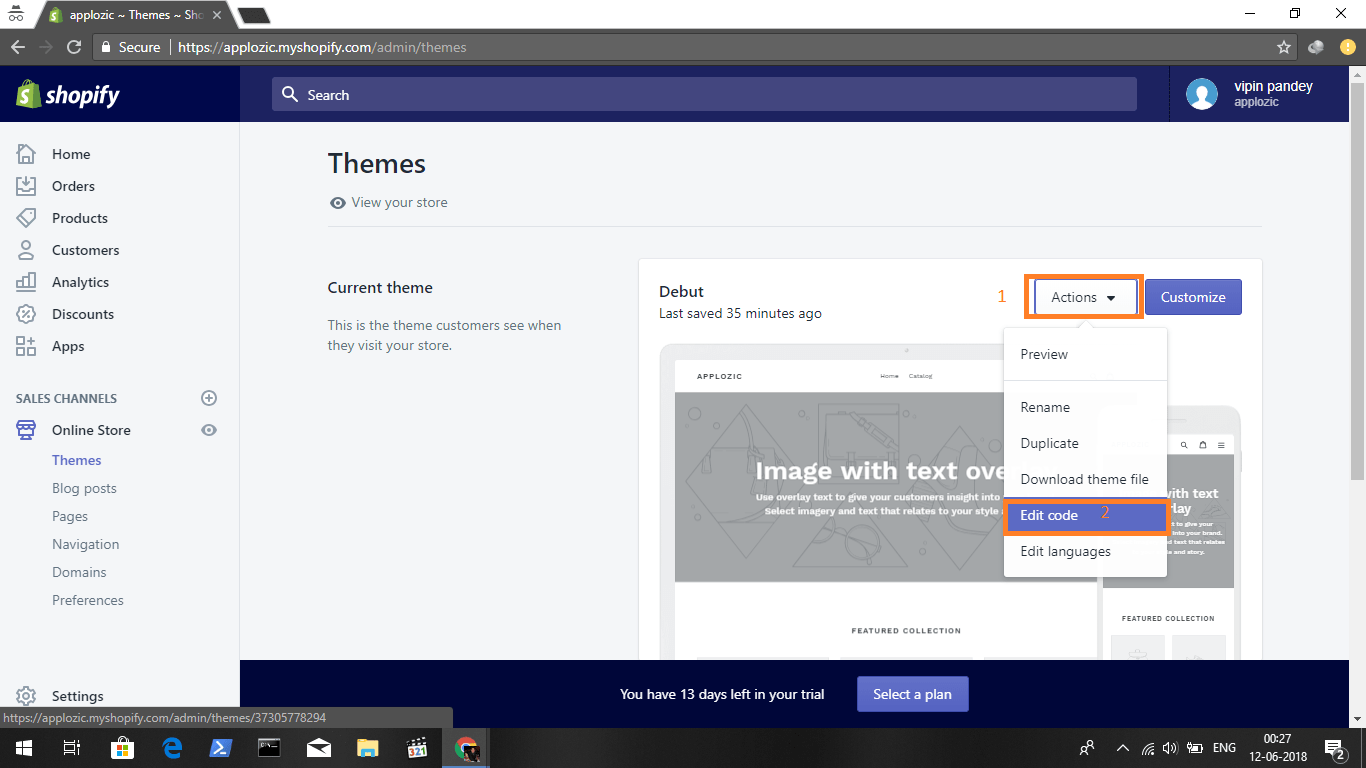
Step 2: Click on Edit Code
Navigate to "Themes" section. Here, click on the "Actions" dropdown menu and select the "Edit Code" option.
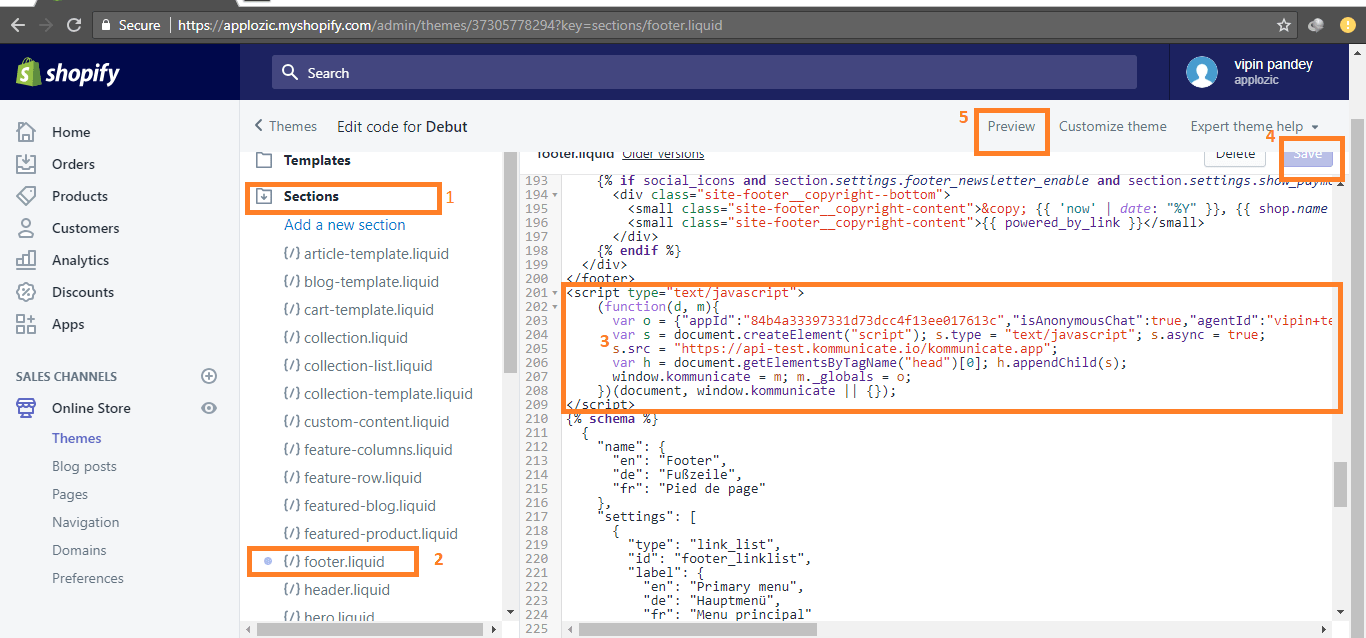
Step 3: Paste the Script
Copy your plugin script from YesHello. On the left panel of the Edit Code Page, click the "Sections" folder to expand it. Press the "footer.liquid" section and paste the chat plugin script.
Once you have pasted the script into the appropriate section, press the purple "Save" button on the top left.
Done!
Open the website and check out the chat plugin. You will find it in the bottom-right corner. Now your website visitors can chat effortlessly with you. If you used the code snippets generated from the YesHello Platform, you will be able to manage the conversations and update the appearance of the widget from the Platform.
The chat widget is now active on your website!
Last updated