Setting Up 360Dialog WhatsApp
360Dialog WhatsApp API is run as a Managed Service. You can request an account here or Contact Us for questions.
360Dialog is an API provider that works directly with WhatsApp. It provides businesses with purchase phone numbers and WhatsApp Official API accounts.
This 360Dialog WhatsApp API integration lets you respond to WhatsApp messages directly from respond.io platform.
This channel has a limited 24-hour messaging window due to WhatsApp regulations. Find out more here!
Connecting 360Dialog WhatsApp API
Once the account is approved, one of our success managers will connect the channel to your account for you.
Channel Configuration
360Dialog WhatsApp channel can be configured with a unique: - Channel Name - Greeting Message
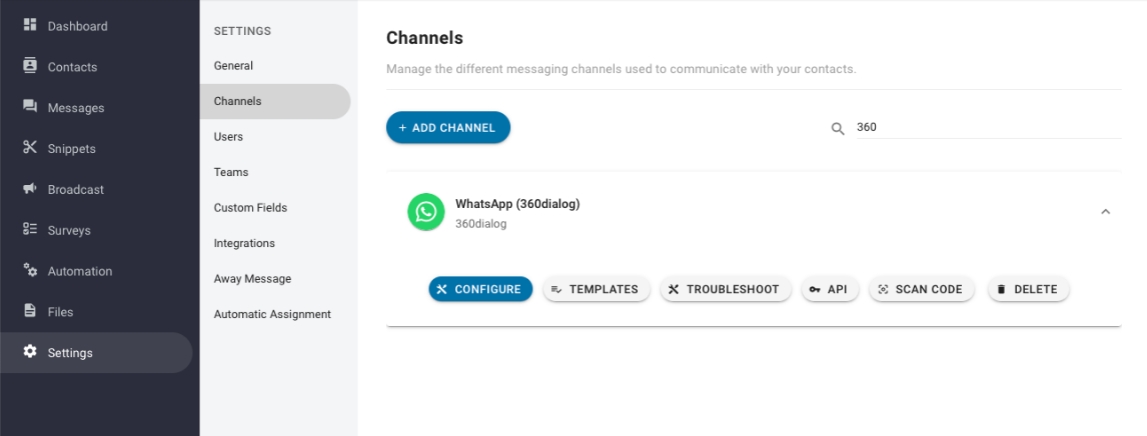
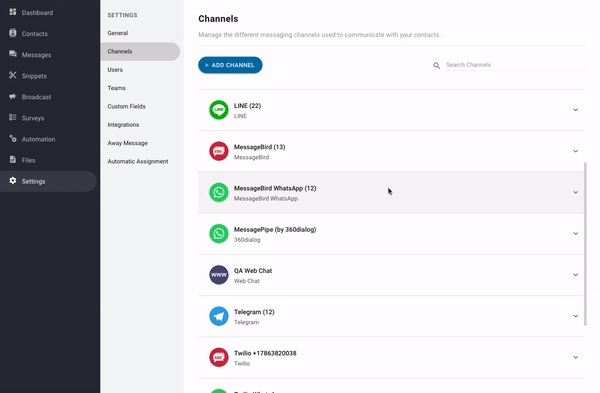
Step 1: Navigate to Channel Settings From Settings Module, navigate to the menu item, Channels
Step 2: Locate the 360Dialog WhatsApp channel Once you have located the 360Dialog WhatsApp channel, press Configure
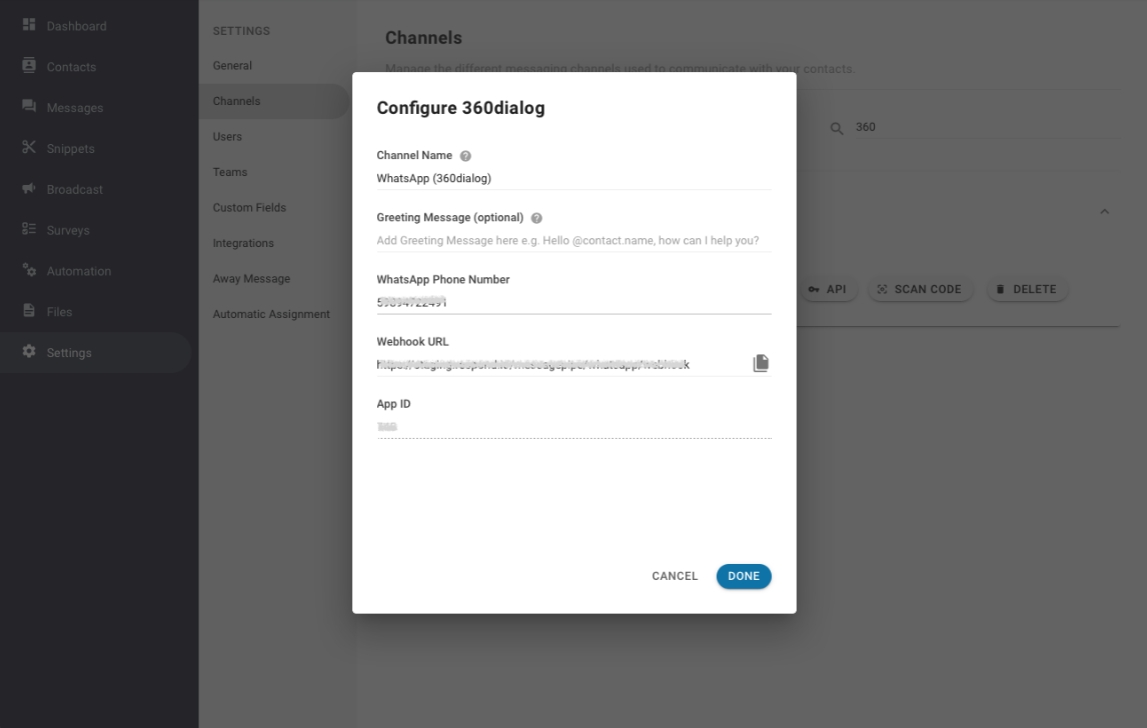
Step 3: Make the necessary configuration You can configure the following:
Channel Name - Name used internally to identify the account
Greeting Message - This message is the first message sent to contact when they message you through 360Dialog WhatsApp.
Important: As for the other details, take extra note while updating as it might fail to receive messages from your 360Dialog WhatsApp account.
Step 4: Update the configuration Press Done to update the channel configuration
Managing WhatsApp Message Templates
Before sending a Template Message to a contact at YesHello platform, please ensure you did the following: - Submitted the message template for approval - Added the approved message template to space
Submitting Message Template for Approval
If you do not have an approved message template or would like to submit a new message template, please refer to the following guide.
As of now, 360Dialog only supports the submission of Message Templates via API. This process will require some technical resources and it is advisable to get some technical assistance while doing this.
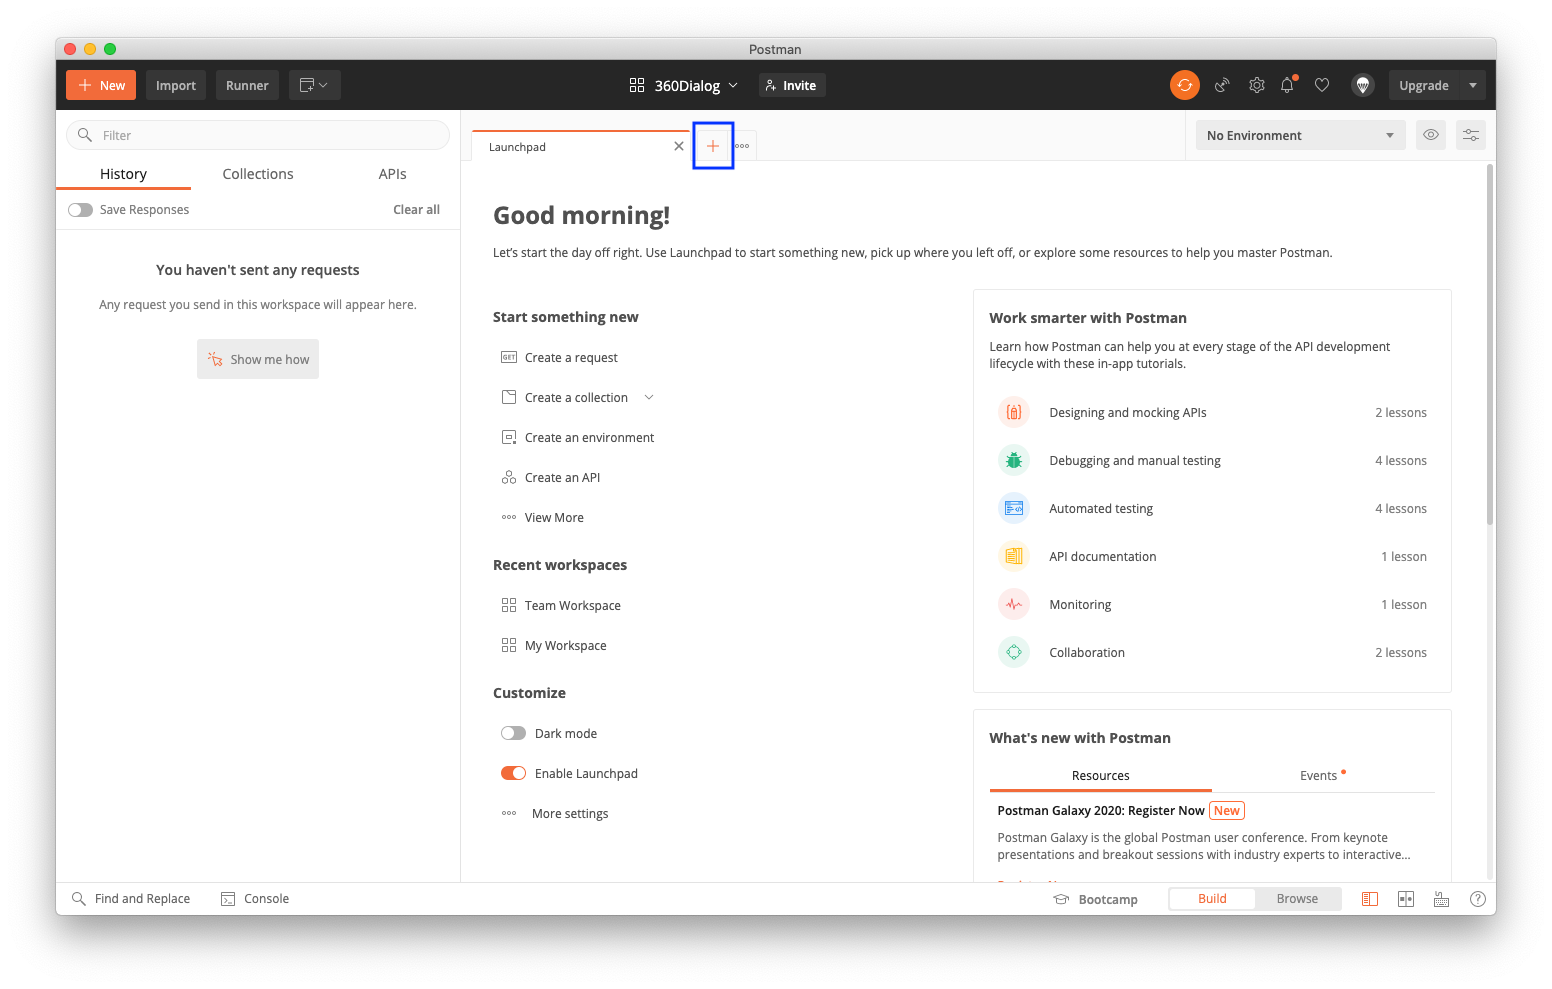
Step 1: Download Postman Download the API client using this link and complete setup. You may skip this step if you have downloaded Postman.
Step 2: Add a request Press on + button as highlighted in the screenshot below and an empty request form will appear
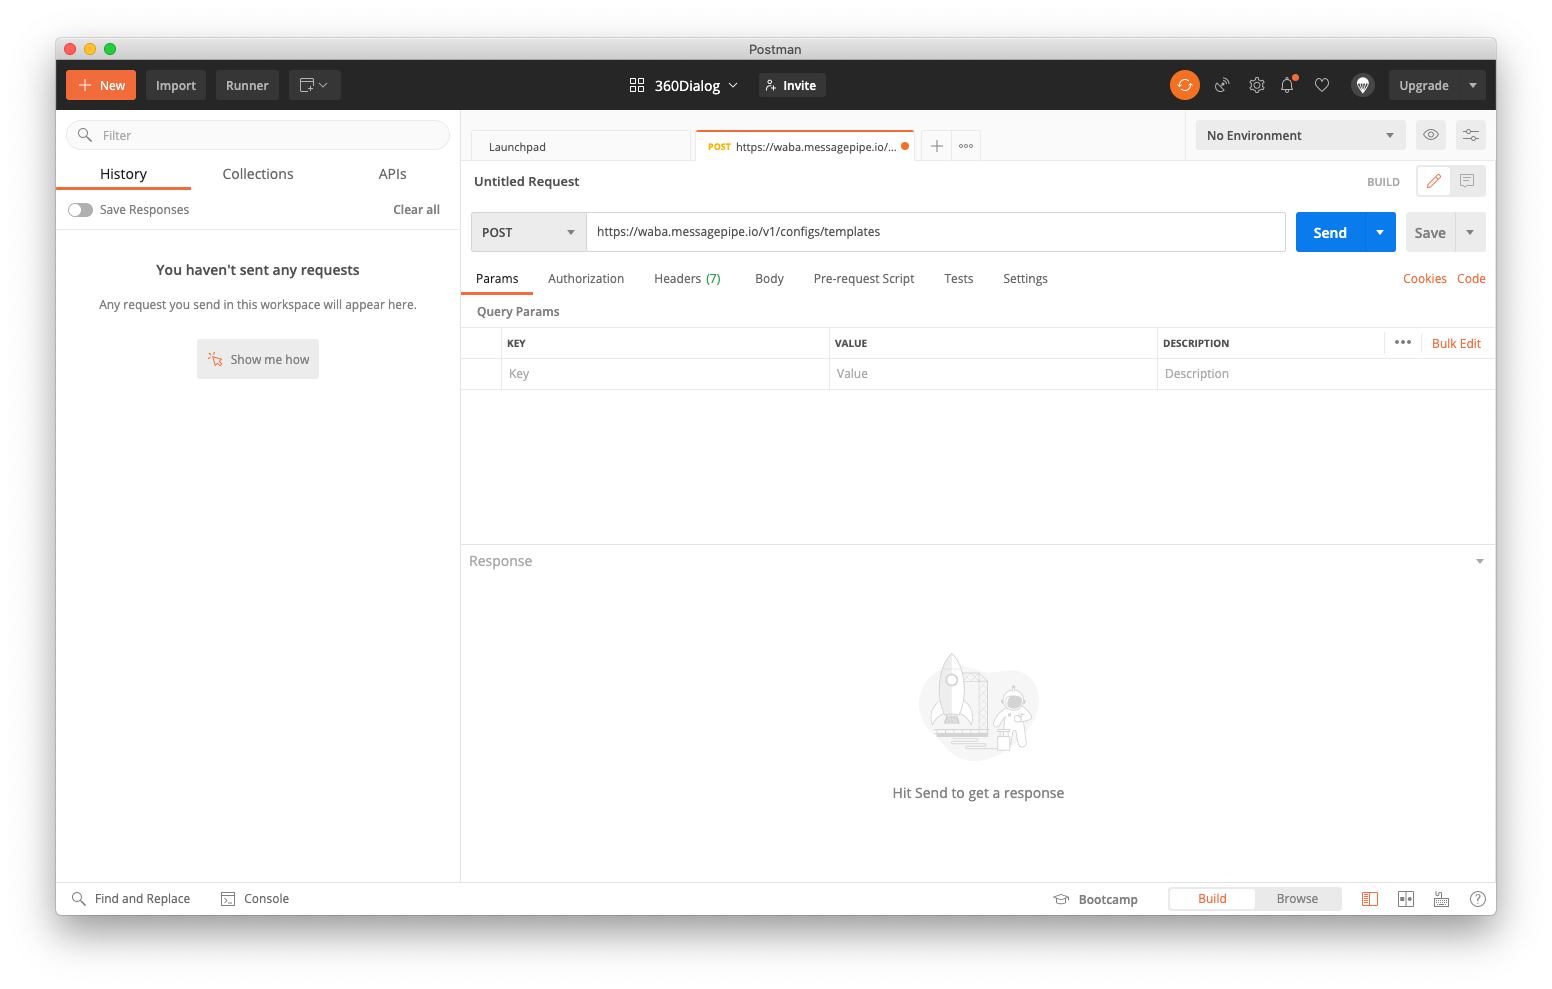
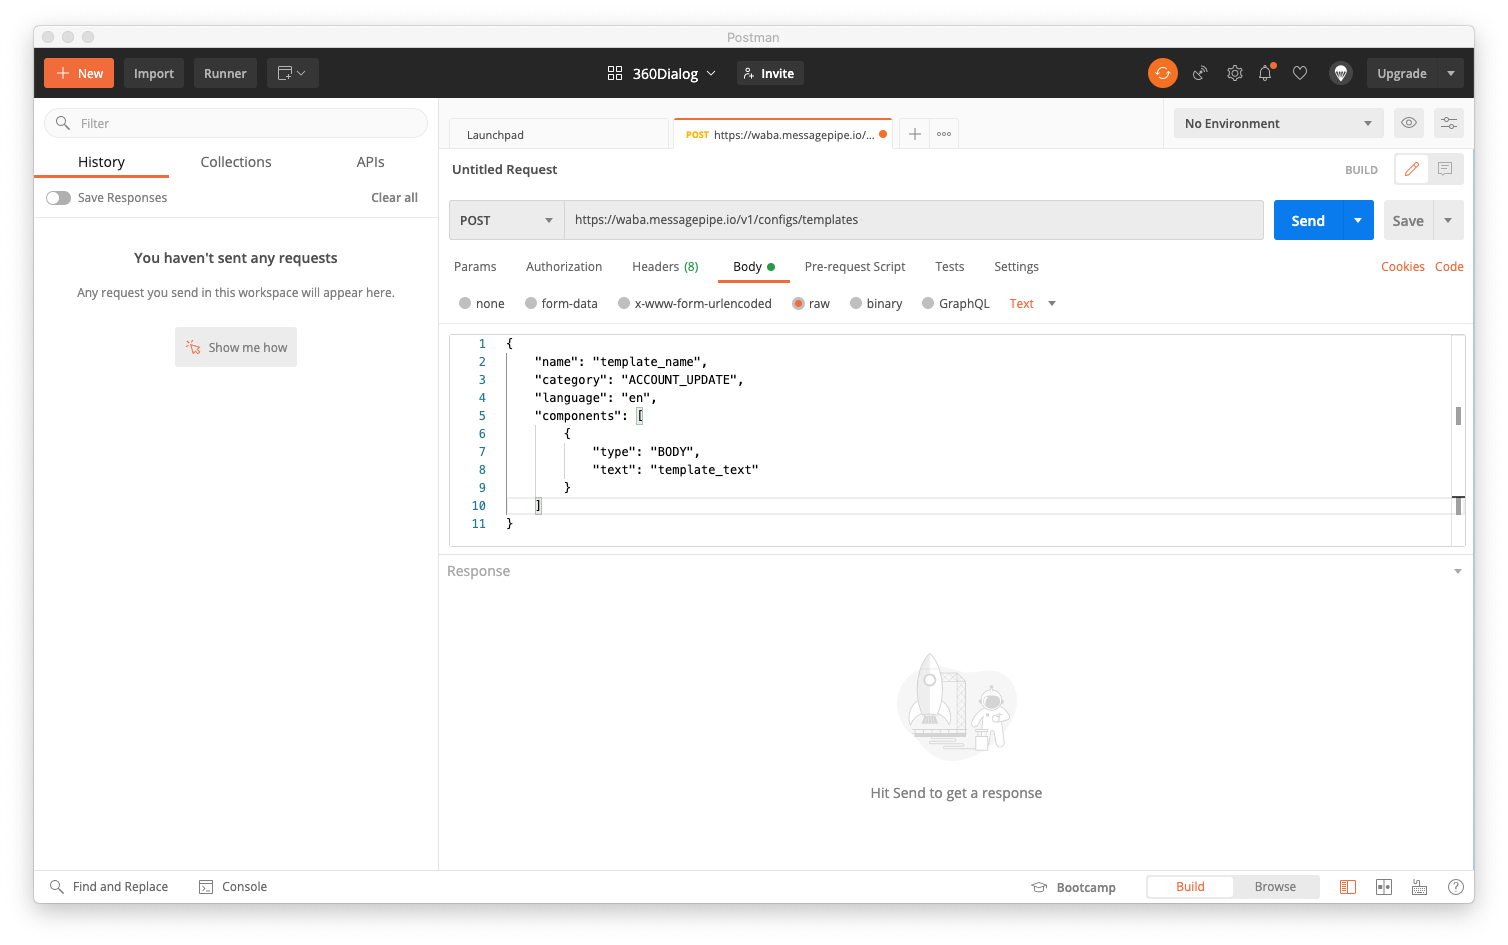
Step 3: Configure the request Change the request type to POST and add the following request URL
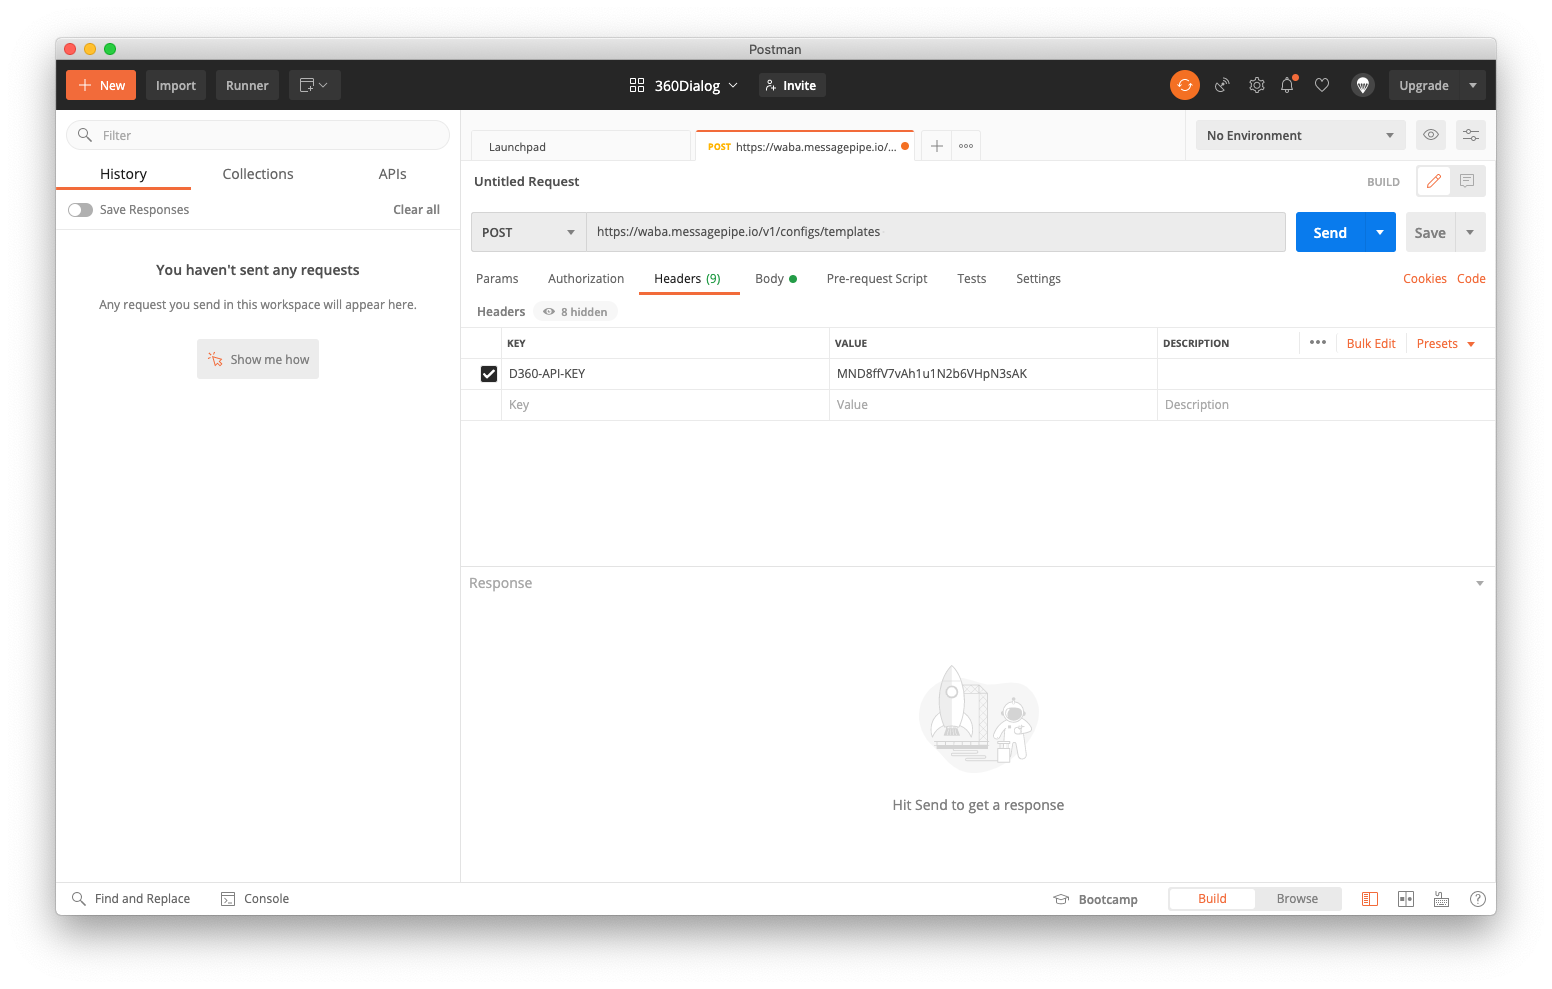
POST https://waba.messagepipe.io/v1/configs/templates
Path Parameters
| Name | Type | Description |
|---|---|---|
D360-API-KEY | string | The API key provided by 360Dialog |
Step 4: Add Headers to the request Select the Headers tab and add the parameters described above
Step 5: Add the following payload Select the Body tab and choose raw format. Paste the following text to the text field.
Please make sure you have filled up the following parameters with the relevant information
Parameters | Description |
name | The name used to identify your template message |
category | The category of which this template message is categorized |
language | The language of which this template message is described in |
text | The text content of the template message |
Step 6: Send the Request Submit the request and you should receive the following response if it is successfully submitted
Detailed instruction for submitting Template Messages for approval are available in the 360Dialog Documentation.
Checking for Submission Status
Step 1: Download Postman Download the API clients using this link and complete setup. You may skip this step if you have downloaded Postman.
Step 2: Add a request Press on ➕ button as highlighted in the screenshot below and an empty request form will appear
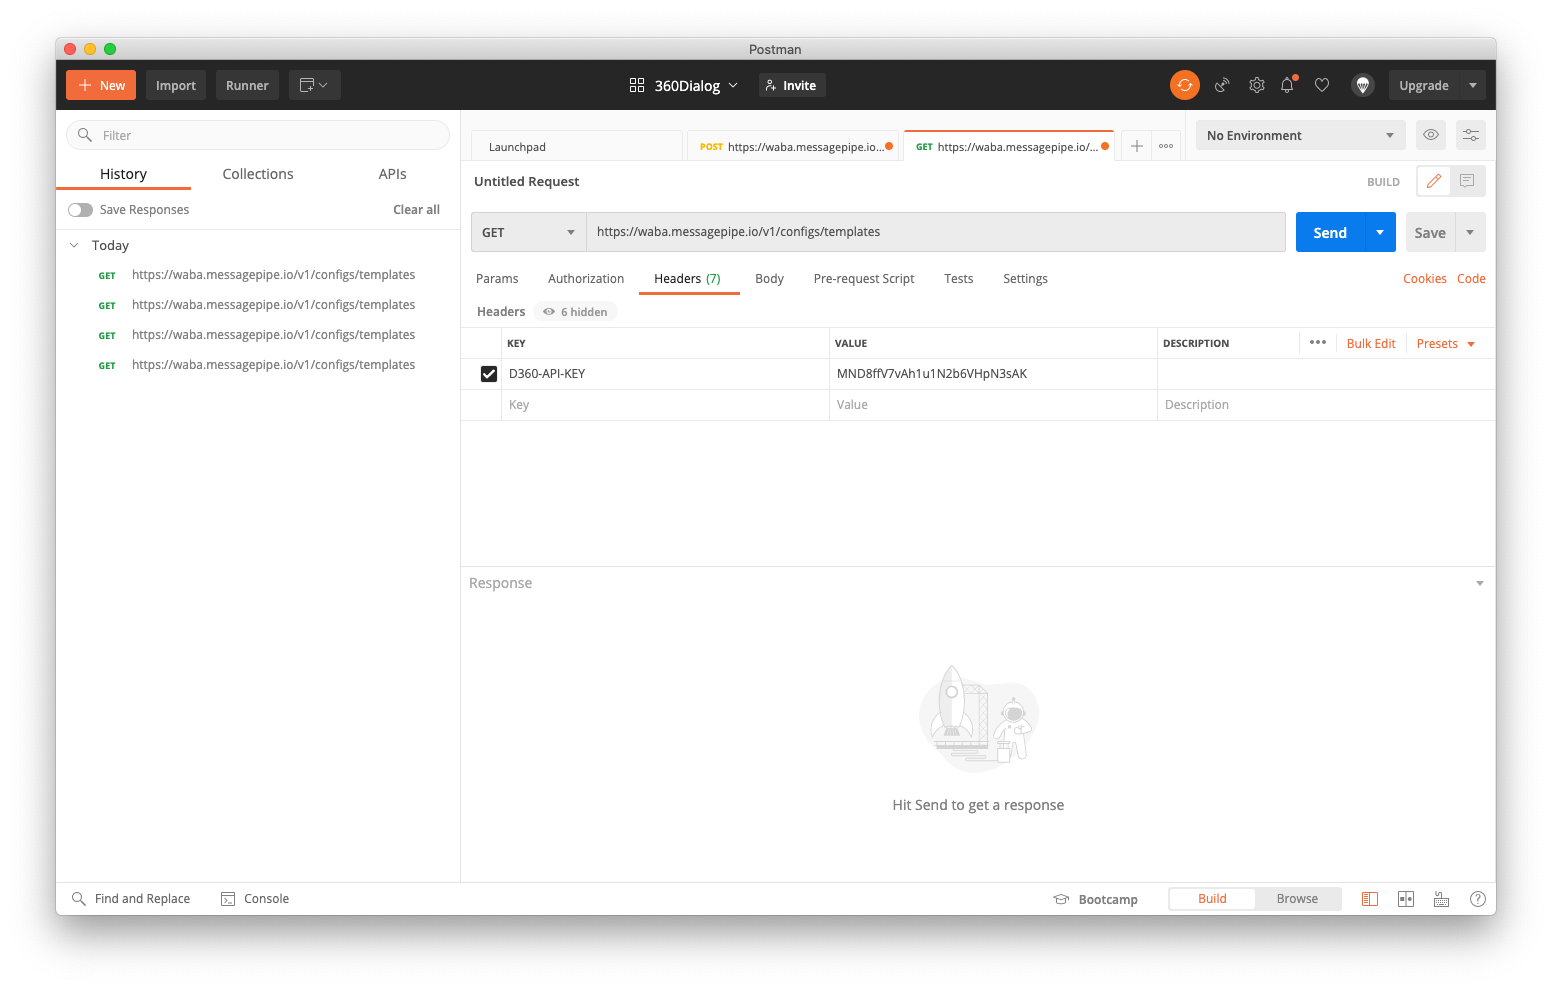
Step 3: Configure the request Change the request type to GET and add the following request URL
GET https://waba.messagepipe.io/v1/configs/templates
Path Parameters
| Name | Type | Description |
|---|---|---|
limit | string | default: 1000 |
offset | string | default: 0 |
sort | string | id, name, status |
Headers
| Name | Type | Description |
|---|---|---|
D360-API-KEY | string | The API key provided by 360Dialog |
Step 4: Add Headers to the request Select the Headers tab and add the parameters described above
Step 5: Send the Request Submit the request and you should receive the following response if it is successfully submitted.
All your submitted templates will be listed in the response along with the submission status. If you need to resubmit, please repeat this step.
Adding the Approved WhatsApp Message Template to the Space
Once your Message Template has been approved on 360Dialog, you may proceed to add the message template on the YesHello platform.
Step 1: Navigate to Channel Settings From Settings Module, navigate to the menu item, Channels
Step 2: Locate the 360Dialog WhatsApp channel Once you have located the 360Dialog WhatsApp channel, press Templates
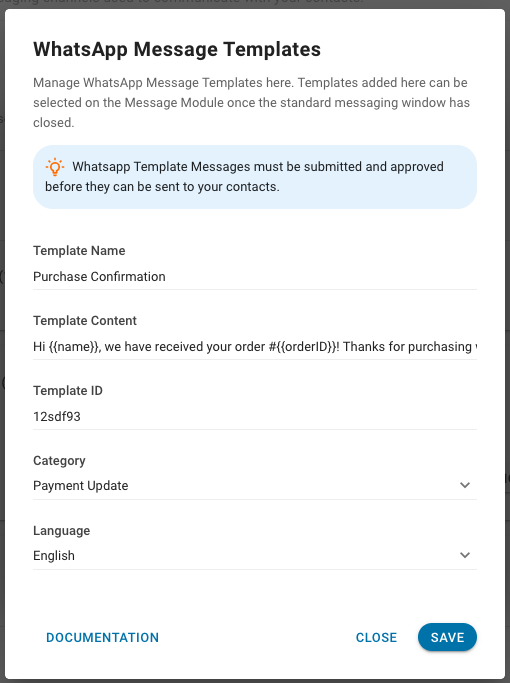
Step 3: Fill in the required information
Fields | Type | Description |
Template Name | Text | A name used to identify the template |
Template Content | Text | The message template approved by WhatsApp and to be sent to the contact |
Template ID | Text | The unique identifier provided by the WhatsApp Partner API |
Category | Single select | In which category does this template belong to. Refer here for list of categories. |
Language | Single select | In which language this template is written in |
Step 4: Save changes Review the information and press SAVE when it is ready.
Important Links Message guidelines by WhatsApp
Troubleshooting
Having trouble with the channel? Contact us here!
Last updated