Broadcasts
Send announcements and messages to your audience.
Getting Here
This module is accessible by Owner and Manager only!
This module can be accessed from the side navigation menu under the menu item, Broadcasts.
The Broadcasts Module allows you to send mass messages to all of your contacts, or target selected portions of your contacts based on tags and channel. You can also browse the history of previously sent broadcasts as well as upcoming scheduled broadcasts.
The Broadcasts Module has three separate views depending on your needs: Calendar, Scheduled, and History. You can switch between these views via the dropdown menu on the top left of the module.
Broadcast View
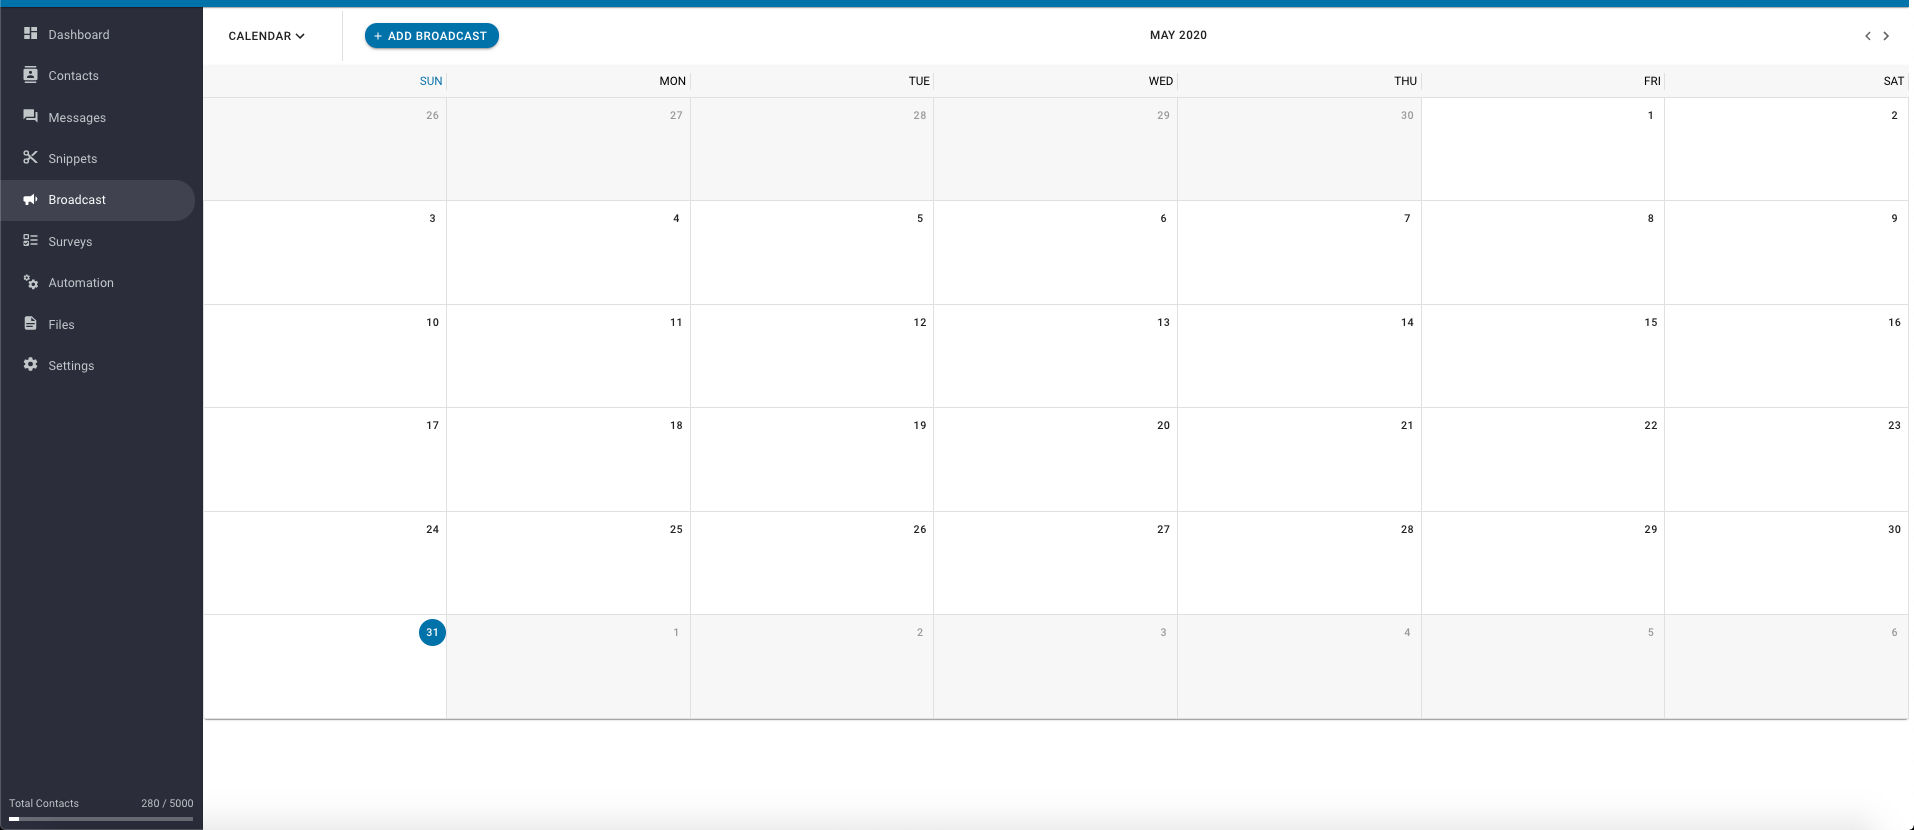
Calendar
In the Calendar view, you can see all of the broadcasts that have been previously sent as well as upcoming scheduled broadcasts on a calendar. Use the arrows on the top right to navigate through the months.
Upcoming broadcasts will be indicated with a colored tab while past broadcasts are indicated with a grey tab. You may click on the item to find out more details about the broadcast and cancel it if it has not been sent.
Scheduled
In this view, you can see a list of broadcasts scheduled to be sent out at a specific date and time.
Tips: Use the "search" function to search for the broadcast you are looking for.
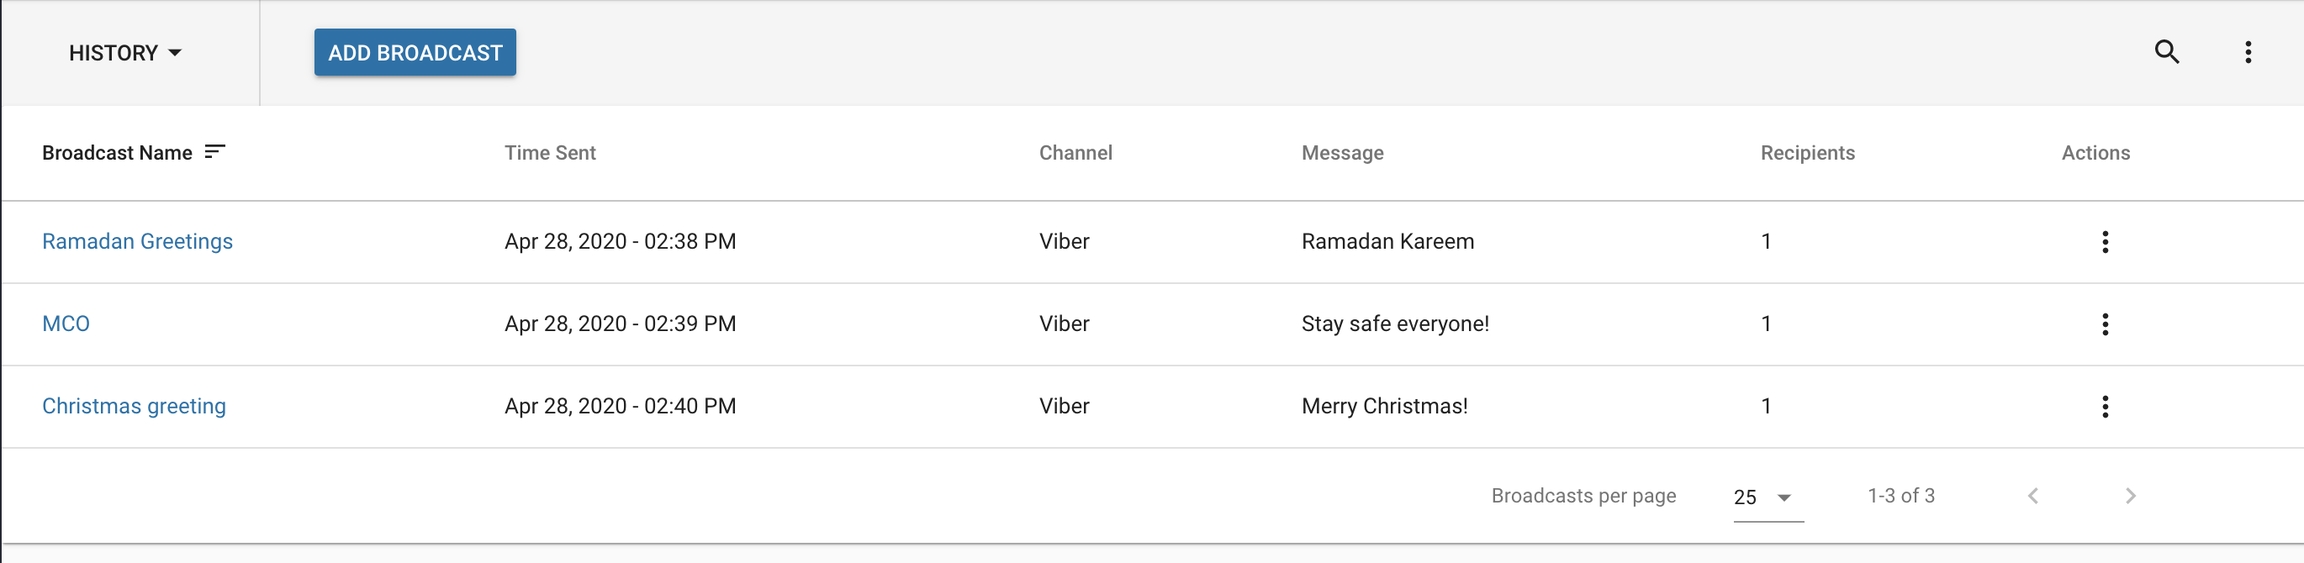
History
In this view, you can see a list of broadcasts scheduled to be sent out at a specific date and time.
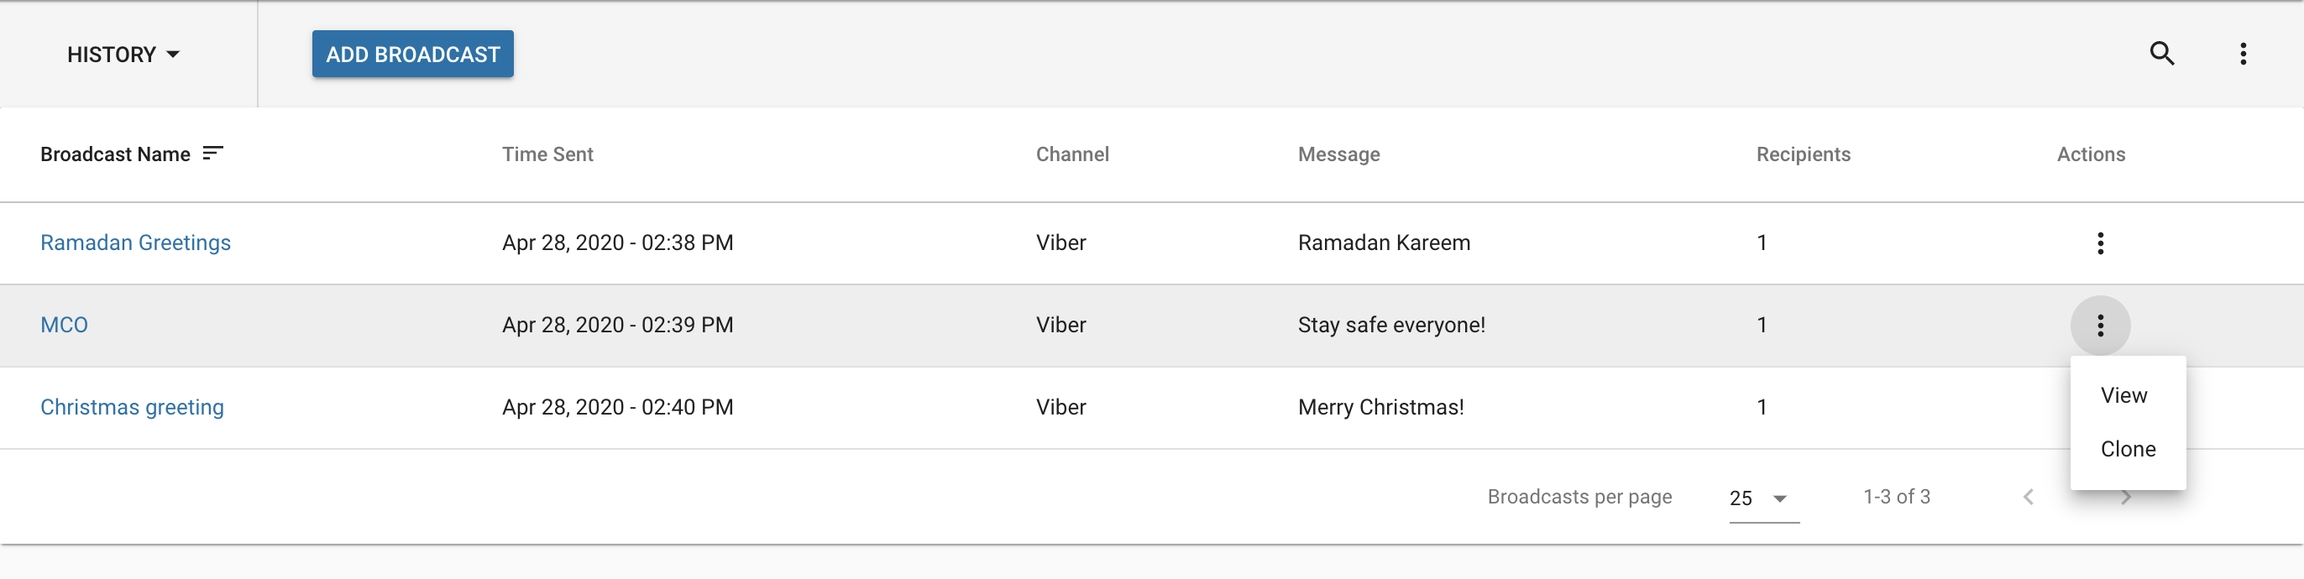
On the broadcast history view, you can quickly look for specific broadcast that you sent out using the search function on the top right.
Managing Broadcasts
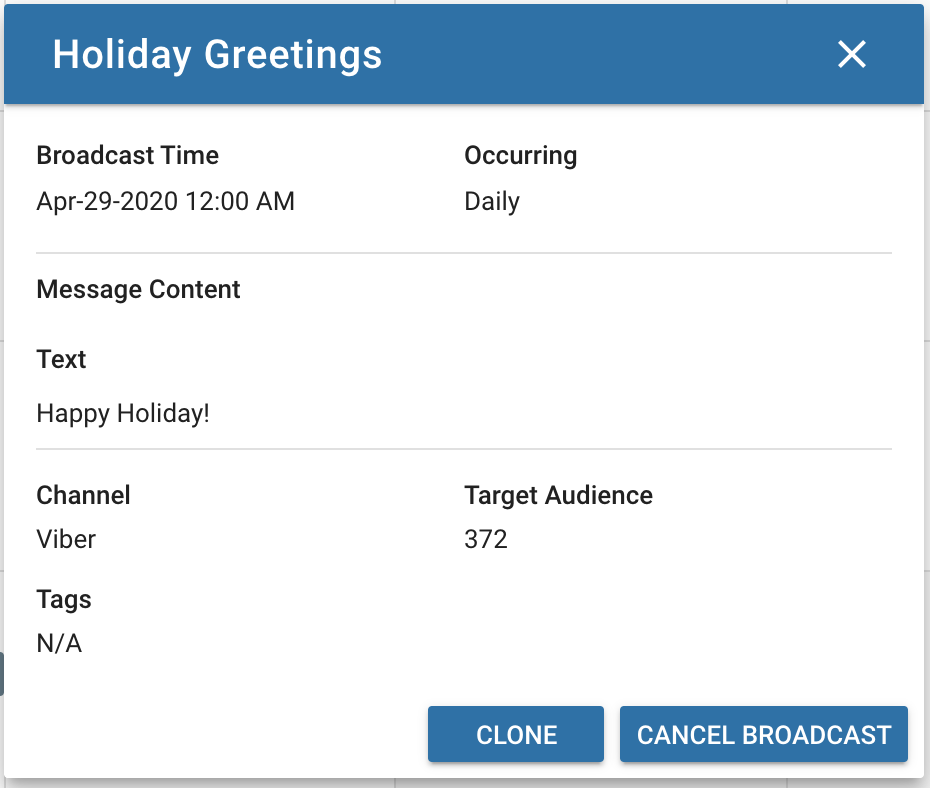
You can view the details of each of the broadcasts by pressing "Edit" under the More Actions dropdown menu. Look for the three vertical dots on the right of each broadcast field.
The "Target Audience" field gives an estimate of how many of your current contacts would receive the broadcast based on your current targeting options.
Here, you can also press the "CANCEL BROADCAST" to stop any scheduled broadcasts. This is useful if you want to end any recurring broadcasts early.
Note that broadcasts cannot be edited once they have been scheduled.
If you need to set a new broadcast having exact content, press on the "CLONE" to clone a broadcast.
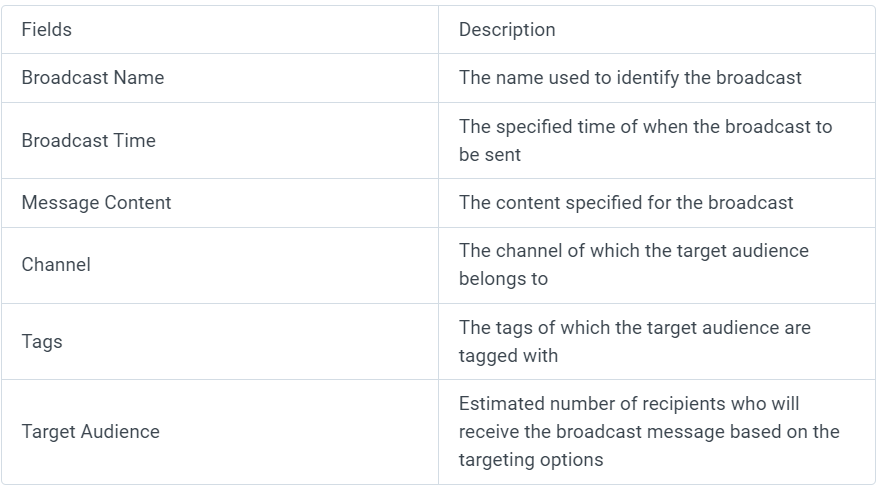
Broadcast Field
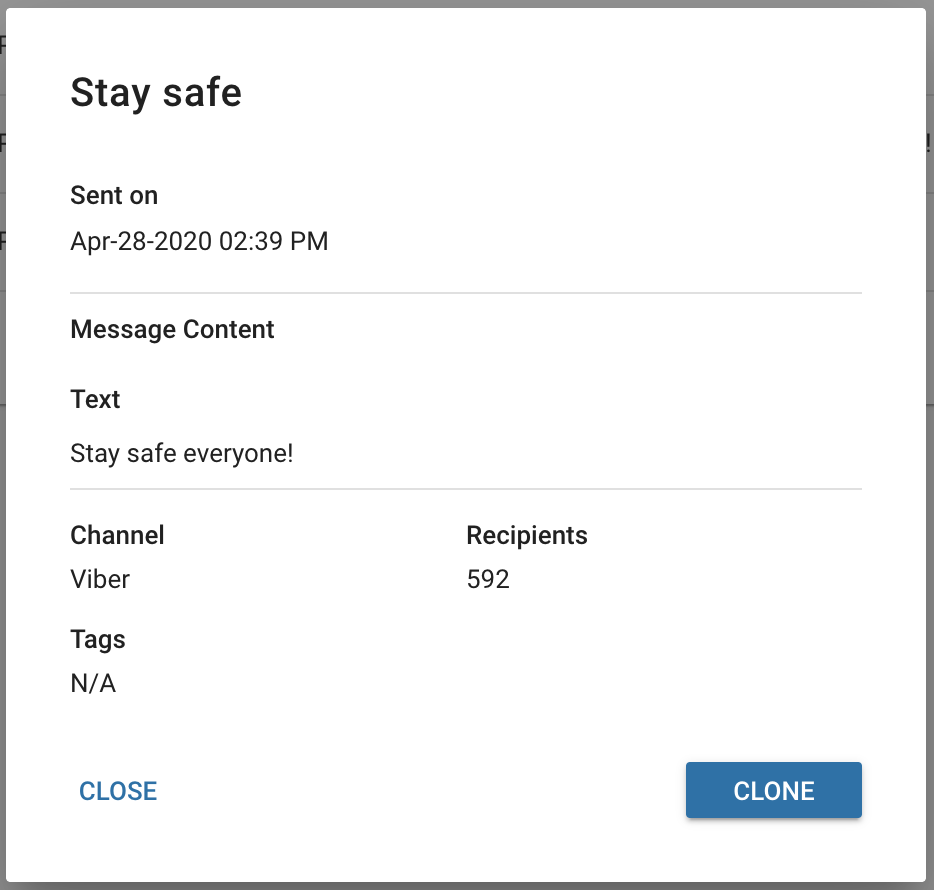
Viewing Broadcast Details
You can view the details of each of the broadcasts by pressing "View" under the More Actions dropdown menu. Look for the three vertical dots on the right of each broadcast field.
The "Recipients" field shows how many of your contacts were sent this broadcast, based on your targeting options that you have set.
The option to clone a broadcast is available here as well.
Creating a New Broadcast
Step 1: Navigate to the Broadcast Module From the side navigation menu, select Broadcast from the menu
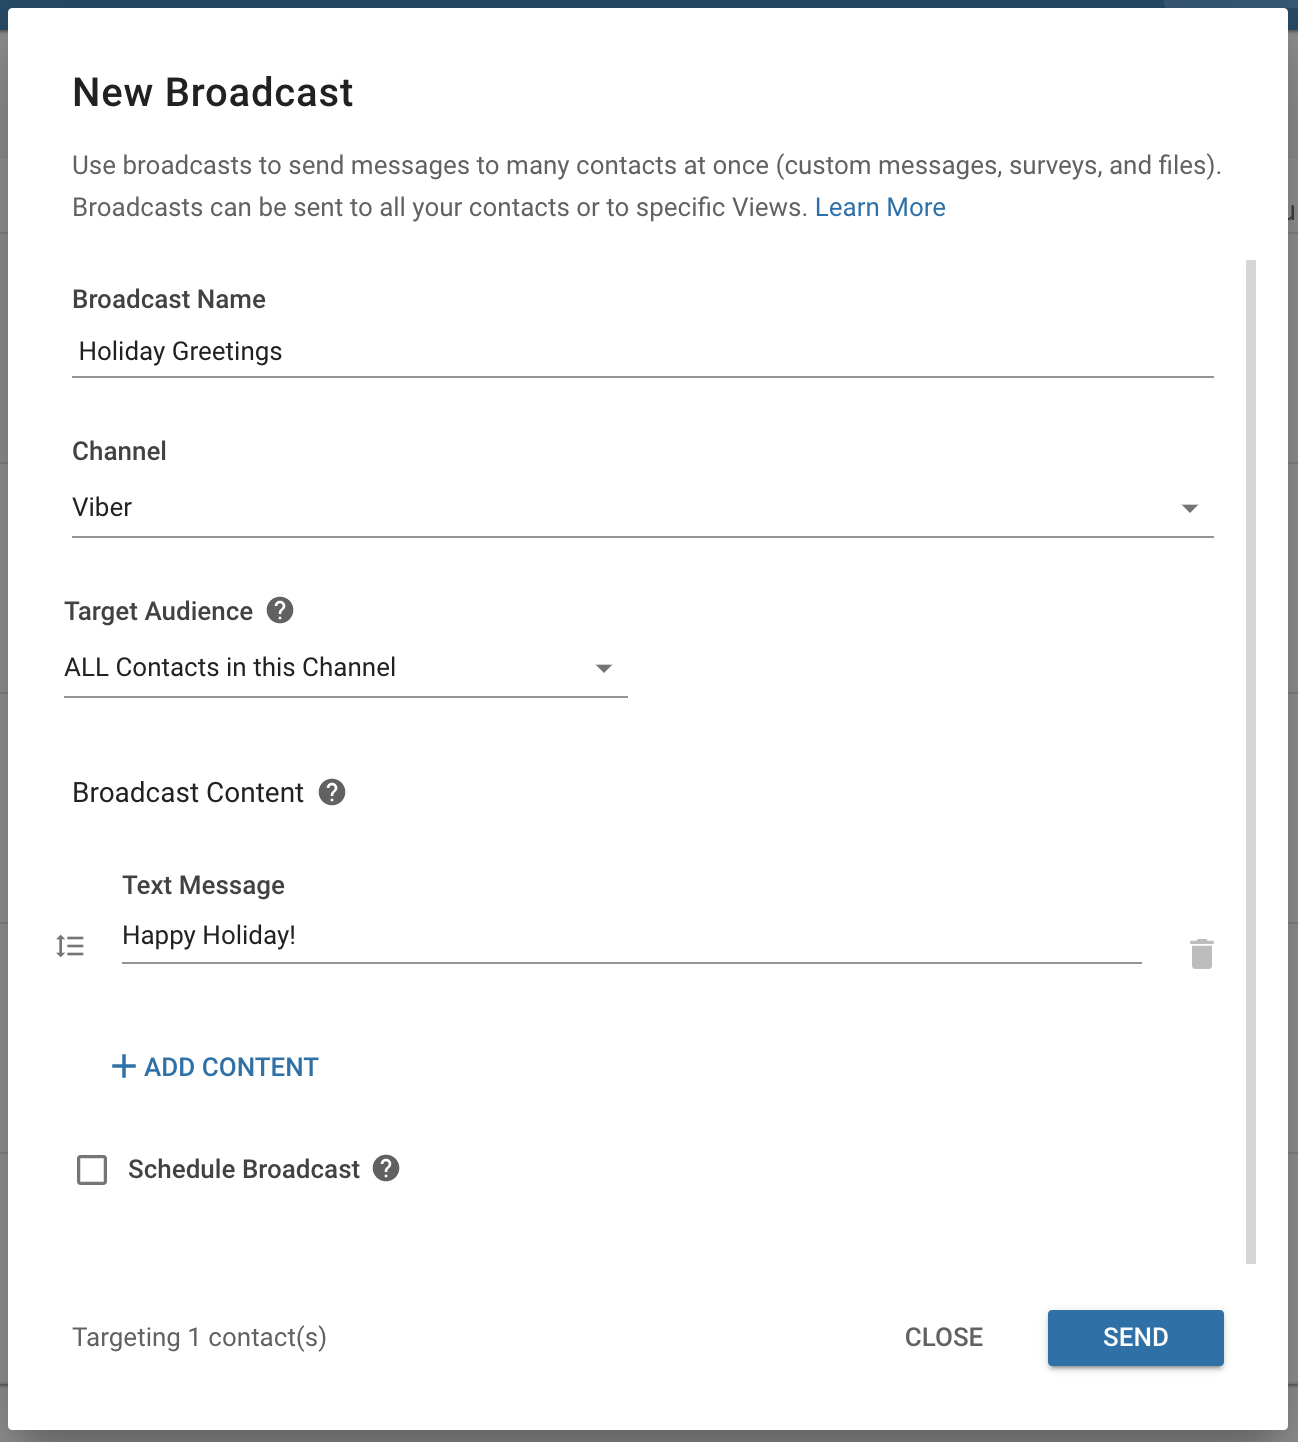
Step 2: Press ADD BROADCAST At the top bar, press the blue ADD BROADCAST button and the New Broadcast dialog should open up.
Step 3: Select the messaging channel Pick the channel you wish to send the broadcast to. Only contacts of the selected channel will receive the message.
Refer here for the list of channels that supports Broadcast.
Important: Depending on your plan, your monthly number of broadcasts may be limited.
Step 4: Name the broadcast Enter a name for your broadcast under the Broadcast Name field.
Step 5a: Specify the target audience
Next, you can choose to select your audience to broadcast to. This can be done by narrowing down your contact list by using tags or segments. You can use tags to filter out the contacts or simply send the broadcast to all contacts under this channel.
Tips: Below the field, you can find the estimated number of contacts that will be targeted under your current settings
Step 5b: Specify audience preference
This option only exists if you select channels that can be enabled by phone numbers!
By default, the targeted audience includes eligible contacts who are not yet connected to the channel. Eligible contacts are contacts who have a phone number that can be connected to the selected channel.
If you wish to send to contacts who have interacted with the channel previously, you may check the box Only send to contacts who interacted with this channel before. Checking this box will only target contacts who have interacted with the channel before.
However, in cases where multiple contacts share the same phone number, only 1 contact will be taken into account and precedence is given to the contact who has connected to the channel previously.
Step 6: Compose the message
Broadcasts via Facebook Messenger and WhatsApp do not share the same content builder as other channels. Please refer to the following for more information.
Facebook Tagged Message
If you have selected Facebook Messenger as the broadcast channel, you will be prompted to specify the broadcast content using Facebook Tagged Message.
WhatsApp Message Templates
If you have selected WhatsApp as the broadcast channel, you will be prompted to specify broadcast content using WhatsApp Message Templates and you are able to check out the message on the preview section.
Composing Your Message
Begin composing the message of your broadcast by pressing the blue "+ Add Content". This will open up a dropdown menu of different types of content you can send.
Each broadcast can hold up to a maximum of 5 messages.
Tips: Include dynamic variables in your broadcast content to personalize the content. This is available for all channels except LINE, Viber and SMS (MessageBird).
You can reorder the existing content by dragging the reorder button on the left of each content.
You can also remove the content by pressing the delete button on the right of the respective content.
Step 7: Schedule your broadcast
If you do not wish to send the broadcast immediately, you have the option of scheduling your message to be broadcasted at a specific time. This is done by checking the Schedule Broadcast radiobox.
Fill in the date and time that you want the broadcast to be sent out and specify the specific time zone to be used.
If you do not schedule the broadcast, it will be sent out immediately instead.
Important
Note that broadcasts cannot be edited once they have been scheduled.
Step 8: Sending a Test Broadcast
Before sending the broadcast to the mass recipient, you can send a test broadcast to yourself or a test recipient to verify the look and feel of the content.
Tips: It is better to check and verify new content before sending it as a broadcast.
Step 9: Confirm and Send Broadcast
Once you have verified the recipients and broadcast content, press SEND BROADCAST or SCHEDULE BROADCAST to submit the broadcast.
Viewing a Broadcast
The Recipients field indicates how many of your contacts were sent this broadcast, based on your targeting options that you have set.
Editing a Broadcast
In Scheduled view, you can edit the upcoming broadcasts that has yet to be sent out. You can do so by pressing Edit under the More Actions menu, the three dots.
Cloning a Broadcast
If you wish to create similar broadcast, you clone existing broadcast and make necessary changes. There are two ways to clone a broadcast,
From More Actions menu, click three dots.
Deleting a Broadcast
If you would like to delete a broadcast, it can be deleted from the space by choosing Delete from the actions menu.
Be careful when you delete a broadcast as it may be used by other users in the space. Bear in mind that deletion cannot be undone.
Exporting Broadcasts
Only Owners and Managers with no such restriction can perform this action!
If you wish to export the broadcasts in the view, you can do so by selecting an export option from the More Menu. You can choose between exporting your contacts in a CSV file depending on your business needs.
Tips : Exporting your broadcasts in PDF is better suited for viewing and sharing. Export them as a CSV file to be more easily edited.
How to Broadcast to Your Contacts Without Official WhatsApp API
How to Add Tags to Contacts in Bulk to Trigger Automated Broadcasting
Last updated